How to Commit Changes to TFS/DevOps After Upgrading Docentric AX Models
If you are INSTALLING the Docentric AX models on a clean environment, please see the manual How to Install Docentric AX via Models.
Upgrade installation: Commit changes to TFS
After you replace (upgrade) the Docentric AX models with scripts or manually, the model folders and descriptor files will be automatically updated. New files will be added and old ones removed, while Docentric DLL file in the bin folder of the DocentricAX package will be updated.
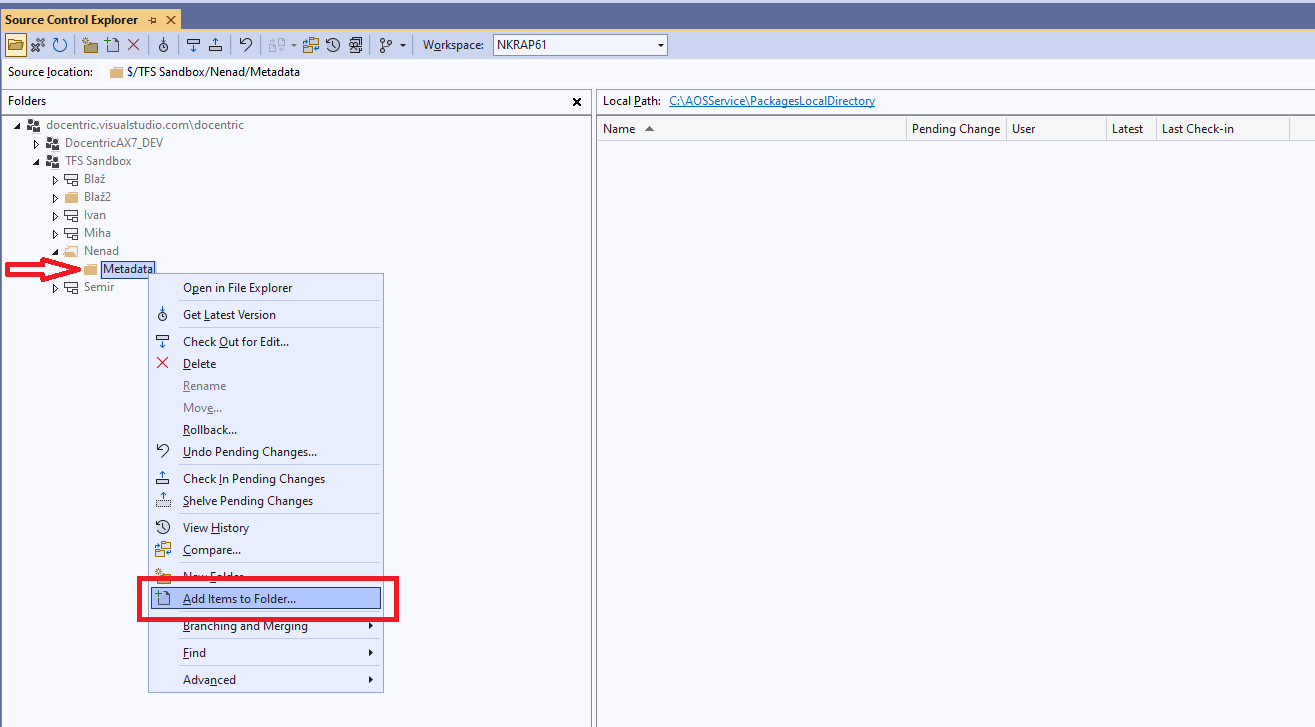
If you would like to check-in all the changes of the upgraded Docentric AX models, make sure that all these changes are listed in Team Explorer\Included Changes, before checking-in them to TFS. Updates are included automatically, while deleted files have to be manually promoted from Team Explorer\Excluded Changes > Detected. New files have to be added manually as well (Add Items to Folder).
Therefore, we recommend taking the following more reliable UPGRADE PROCEDURE.
Recommended upgrade procedure when using TFS
- Stop IIS (or IIS Express) and the Batch service.
- Delete all Docentric AX models (i.e. packages) from TFS and CHECK-IN THE CHANGES.
 DO NOT delete DocentricAXSSRSReplicas if you have customized the model directly, neither any other direct customizations of Docentric AX models you might have done. We recommend to always do customizations of Docentric code in your own custom models, that makes the upgrading of Docentric smoother.
 - Delete these Docentric AX package folders from the disk, since these might not be deleted, even if they were deleted on TFS:
- AOSService\PackagesLocalDirectory\DocentricAXLicensePlateLabels – OBSOLETE since Docentric version 3.4.8. Follow these instructions if you're upgrading from a version pre 3.4.8.
- AOSService\PackagesLocalDirectory\DocentricAX
- AOSService\PackagesLocalDirectory\DocentricAXExtension
- AOSService\PackagesLocalDirectory\DocentricAXEmails
- AOSService\PackagesLocalDirectory\DocentricAXWarehouseLabels
- AOSService\PackagesLocalDirectory\DocentricAXSSRSReplicas – DO NOT delete if you have customized the replicas directly in this model!
- AOSService\PackagesLocalDirectory\DocentricAXCBDReplicas – DO NOT delete if you have customized the replicas directly in this model!
DO NOT compile or synchronize the database at this point.Make sure to also delete the Docentric.AX.dll from the DocentricAX\bin directory and commit its deletion to TFS! - Since we deleted the Docentric AX models, you can manually import the latest version of the models by using ModelUtil.exe (modelutil -import) as it goes for the clean installation.
Alternatively, you can use the scripts from the downloaded ZIP packages – DocentricAXInstallCoreModels.cmd and DocentricAXInstallSSRSReplicasModel.cmd to import/replace the models.
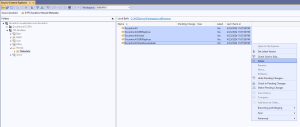
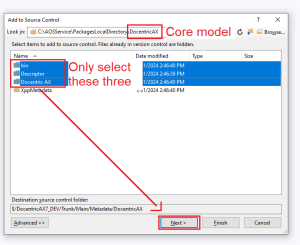
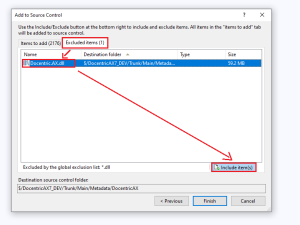
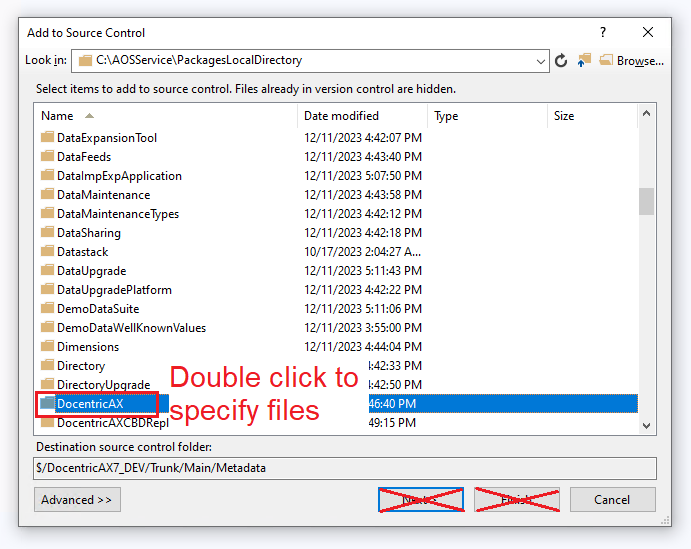
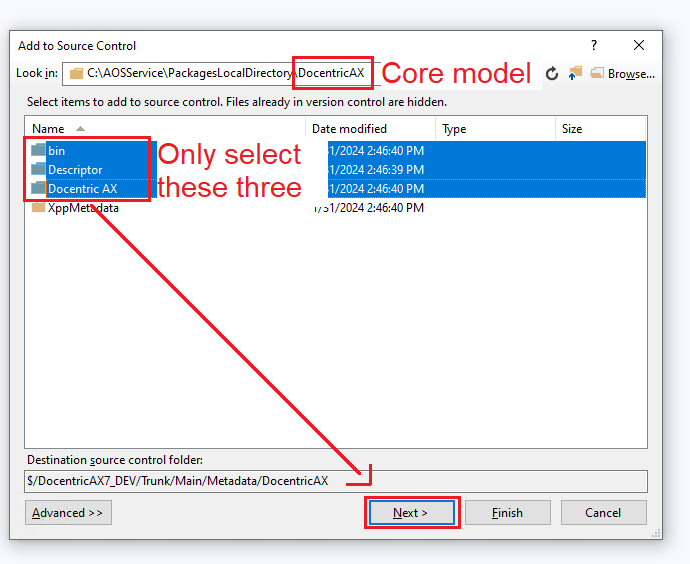
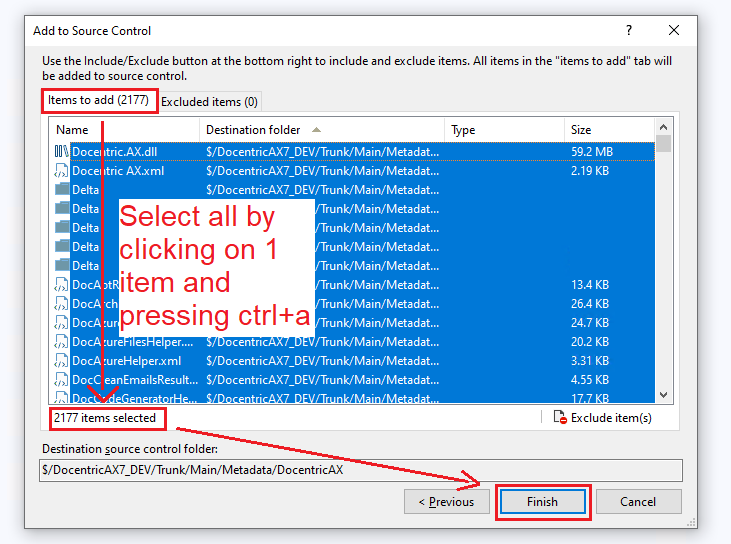
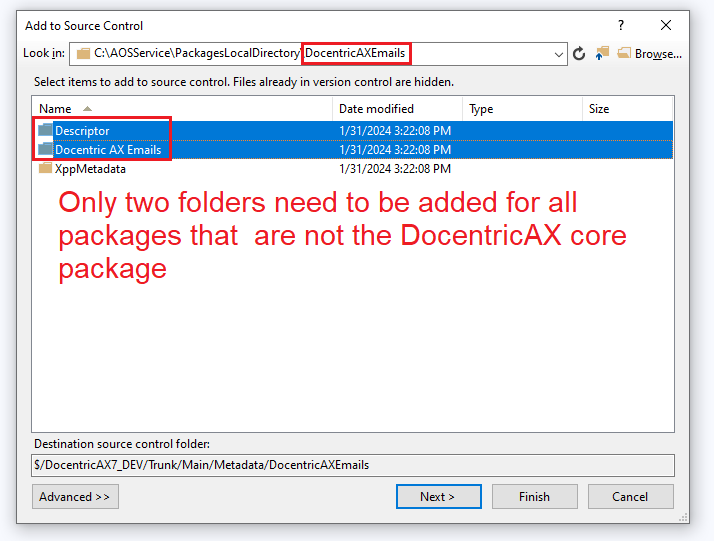
- Add the regular artifacts from Docentric AX models to TFS the same way as a clean installation. Make sure that the correct DLLs from the DocentricAX\bin folder are added to TFS.


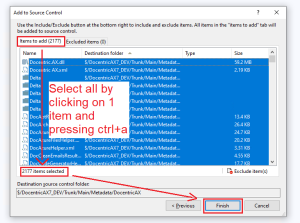
 As with a clean installation, the only file from the Docentric AX\bin folder you should add to TFS is the Docentric.AX.dll file. All other files, which will be created in this folder after the first build, including Dynamics.AX.DocentricAX.dll, are build artifacts and SHOULD NOT be added to TFS.
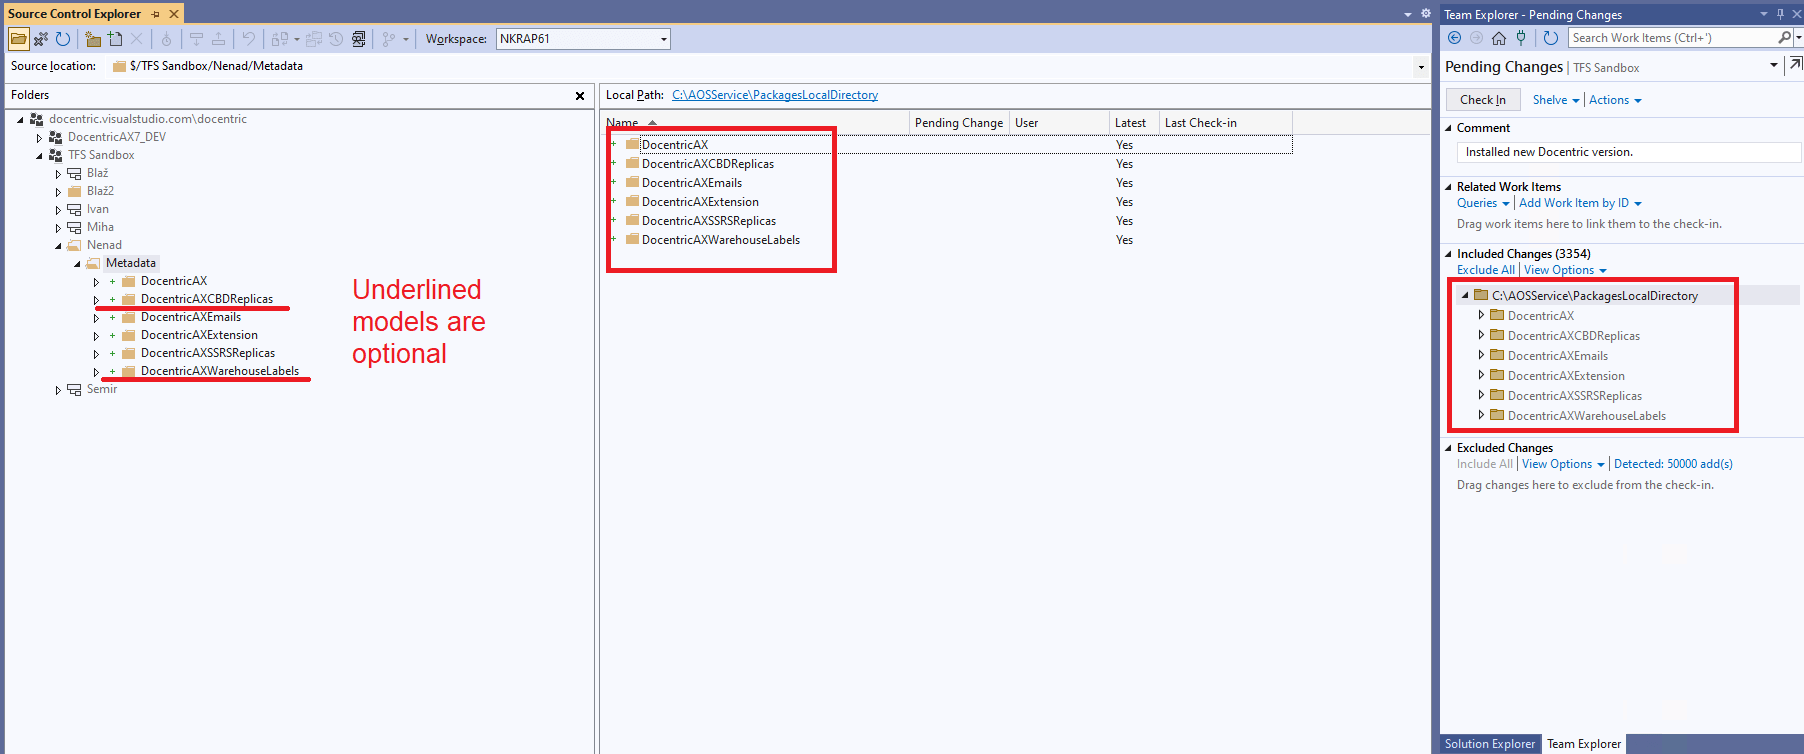
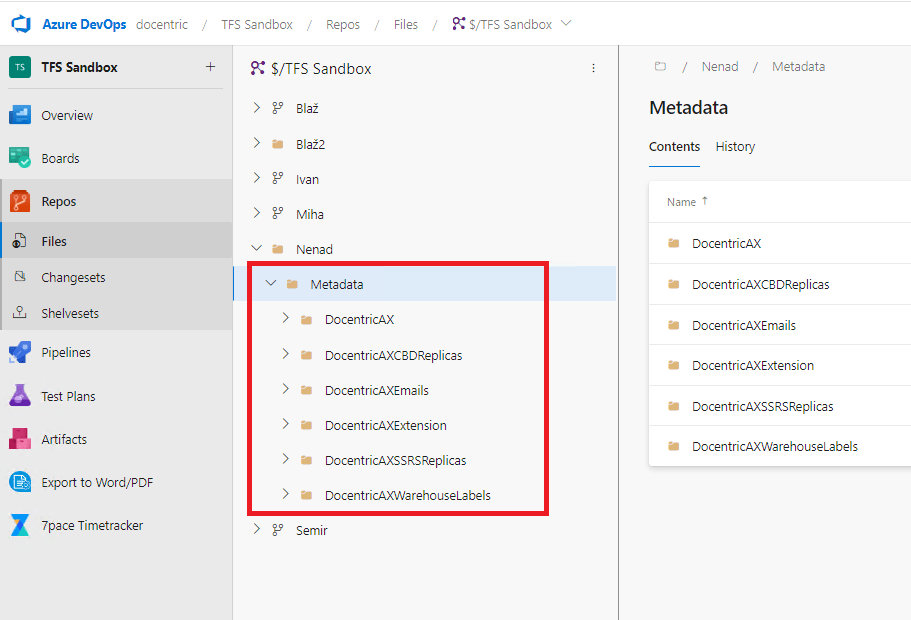
 - Check-in the changes and verify on the TFS (Azure DevOps) portal that you really have the right code in place in the repository.


- Build the Docentric AX models.
- Synchronize the database.
Alternatively, you can use DocentricAXBuildAndSyncTool.cmd, one of the scripts from the downloaded ZIP packages, to build the models and synchronize the database.
- Start IIS (or IIS Express) and the Batch service.


See also
How to Add Docentric AX Models to TFS/Azure DevOps >>
How to Upgrade Docentric AX Models >>
Troubleshooting the Upgrade to 3.4.8 or Above >>