How to Set Up Global Parameters
Before starting to using Docentric AX you might need to review Docentric AX global parameters described in this tutorial. After installation, these parameters are set to some default values that you can change using the Docentric AX Parameters form.
The Docentric AX parameters form can be open from the Docentric AX workspace, or from the Organization administration module menu.
The Docentric AX workspace is located in the default dashboard among other workspaces.

Also, the Docentric AX workspace can be open from the Organization administration module menu. You can also directly arrive to the form by clicking the Docentric AX parameters menu item from the Docentric AX menu, which is the last menu within Organization administration module menu.

The Docentric AX workspace looks like the following.

Open the Docentric AX parameters form and take a look on each of the tab pages.
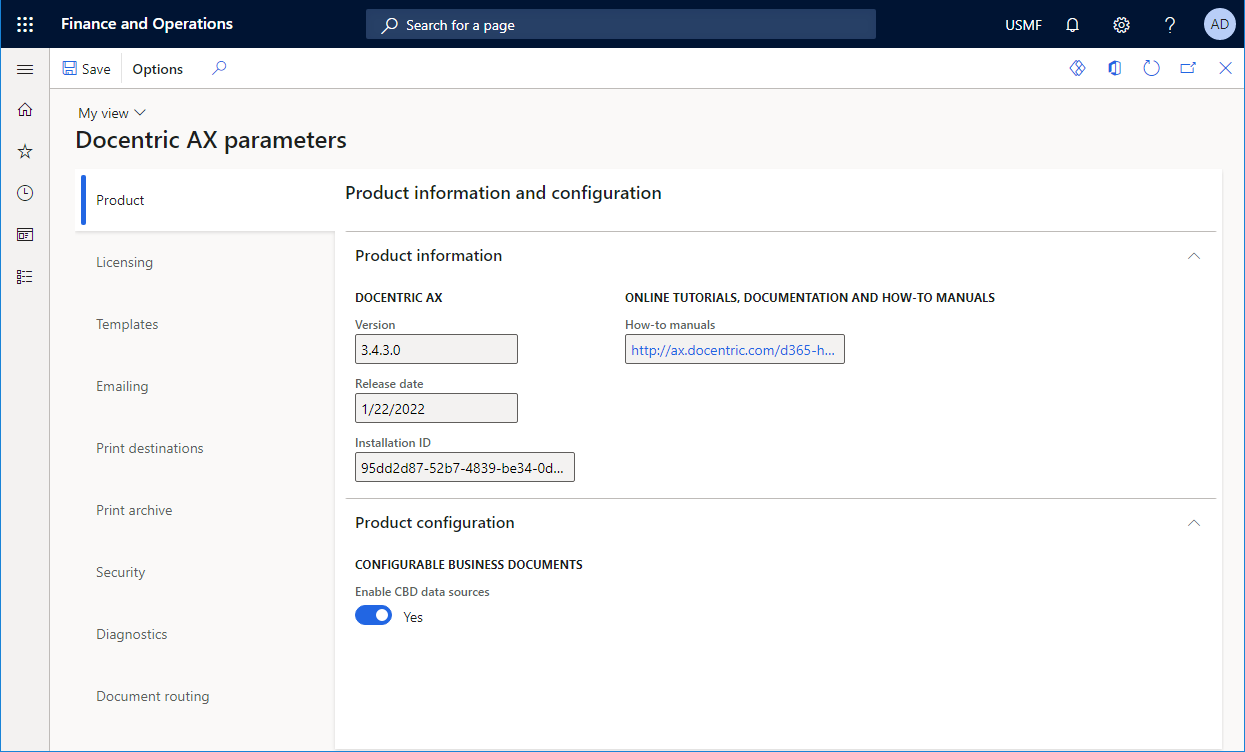
Product
In the Product tab page you can find Version and Release date of the product likewise online tutorials URL.
You can also turn on or off some product features such as Configurable business documents > Enable CBD data sources.
Learn more on Configurable business documents >>
Licensing
In the Licensing tab page you can unlock the product or to renew your subscription. You can also export the license, or remove it and downgrade from Full to Free Edition.

Templates

Default template storage
In the Templates tab page you can specify the default template storage on SharePoint, Azure Blob storage and File system.
This info will be used when customizing system templates, which are stored as AOT Resources, as default values for template storage settings. Also, the same info will be used with custom templates, which are usually created by end users in a production environment.
Learn more about template storage >>
Templates fonts
If your Docentric templates contain custom fonts or fonts that are missing in your environment, which can happen in self-service deployment environments, you can upload them here. The uploaded missing fonts will then be used by Docentric Generator for generating PDF documents from Docentric templates.
Before uploading missing fonts, you can generate the report of currently installed fonts in the environment by clicking the Show installed fonts button.
To upload missing fonts, first turn on the Enable custom fonts option and specify the name of Blob container with fonts. Then zip all the needed font files and click the Upload Custom Fonts button to upload them to your environment. Each time when a ZIP package with custom fonts is uploaded, it will overwrite the previously uploaded fonts if such exist. Learn more >>


Emailing
In the Emailing tab Email parameters and SMTP client settings can be set up.

General settings
Suppress outgoing emails: You can prevent outgoing emails from sending to the recipients by choosing the Suppress option. Suppress with download will suppress and download in browser every outgoing email unless the execution is in batch. Applicable when emailing reports via Docentric Email print destination or sending email messages via Docentric Email distributor batch. You may find suppressing outgoing emails useful in UAT environments.
Troubleshooting techniques: An extensive tutorial for solving emailing issues.
Default email sender account
Email parameters: Link to the system email parameters page.
Send test email: Use it to check if the Default email sender account is set correctly.
Placeholder: Instead of Use it to check if the Default email sender account is set correctly.
Default email sender account: read-only field displaying the selected Batch email provider type and the corresponding user name.
Email sender display name is used as the email sender display name when emailing reports, e.g. Docentric Services. This is applied for all Docentric reports except those, which have this value set differently in the report setup. It is even possible to set different values for different companies for a single report.
Additional email sender accounts
Use this grid to specify the additional email sender accounts by providing the Username, Password, Outgoing mail server, SMTP port number, Is SSL required and Email sender display name property. When the From address value in the Email print destination on the Print destination settings form matches one of the values in these additional email sender accounts, then the matched sender will be used for emailing the report.
SMTP client settings
Here you can set up additional SMTP settings such as SMTP client timeout, Body transfer encoding, Smtp delivery format and Body and subject encoding.
Email distributor batch
Use Docentric email distributor batch: With this option turned on you will be able to use multiple email sender accounts set in Docentric AX parameters, not only the default one set in Email parameters. Also, it enables use of additional fields of email messages such as Cc, Bcc, Reply-to and Bounce-to when emailing reports.
Enable email sending log: Enable logging for Email distributor batch. This way you will be able to check error messages for failed emails directly on the Batch email sending status form.
In both cases however, if you already have Email distributor batch up and running in your environment, you will need to reschedule it, i.e. to stop the batch job and start it again while these options are turned on.
Learn more about report emailing capabilities >>
Print destinations
In the Print destination tab some settings related to the print destinations can be set up.

Screen print destination
In the Select report viewer combo box select which report viewer to use for previewing reports when using Docentric Screen print destination.
The Max number of reports open in viewer setting is applicable for multi-document output reports such as Customer account statement and Payment advice. If zero, the default value (3) will be used.
File print destination
In the Default destination Azure container and Default destination Azure file share fields specify the default target blob container on Azure Blob storage and the default target file share on Azure Files where report output files are saved.
In the Default destination File system folder field specify the default target network folder on File system where report output files are saved. Applicable only for on-premises environments.
These values will be set when a user configures print settings for a report for the first time using the Print destination settings form.
When saving reports to Azure Files, additional costs may be incurred if the target Azure file shares don’t exist and should be created first. That’s why we introduce a configuration setting Creation of non-existing file shares with the following options:
- Configurable: Users can configure on the Print destination settings form > Save to Azure Files whether to create a non-existing Azure file share or not.
- Enforced: Non-existing Azure file share will be created automatically, with the storage tier inherited from the storage account.
- Forbidden: Non-existing Azure file share will not be created and report will not be saved to Azure Files.
Printer print destination
Uuse the Default printer menu items to set up the default printer for current legal entity, or for user groups, or for users. If Allow users to set up default printer is turned on, every user will be able to set up his or her default printer in User options.
Use the Restricted printers menu items to set up which printers are allowed for which reports. Use the Restricted printers mode selection to specify if and when the Restricted printers setup is applied.
Use the User printers menu items to set up User Favorite or User Allowed printers. Use the User printers mode selection to specify if the User printers setup is applied as User Favorite or User Allowed printers.
Use the Network printers link to jump directly to the system page for configuring the network printers.
Learn more about report printing capabilities >>
Print archive

Document type for archiving: Document types for saving reports to Print archive can be set per company. Different setup for particular reports can be configured in Docentric report setup. On top of that, from version 3.4.6 you can configure Document type for archiving per report execution, directly on the Print destination settings form. Learn more >>
Archiving report files: Set up if report output files printed in the format different from PDF (e.g. Word or Excel) should be archived in addition to PDF files. This is applicable to Email and File print destinations.
When archiving emailed reports: Set up if additional email attachments should be archived in addition to report output files.
Archive report parameters: Set up if report parameters (including dynamic parameters) should be saved in Print archive when archiving reports. Hidden parameters will not be archived. If you select archiving with UI names, current user language will be used for label translations.
Note that these settings affect all companies but can be additionally configured per report in Docentric report setup. Archiving will be done using the selected Document type for archiving.
Learn more about improved Print archive >>
Security
In the Security tab some security settings can be configured. For example, you can make the Generate DS print destination invisible on the Print destination settings form for all reports, by turning off the Is Generate DS visible checkbox.

Print destination settings form
You can decide whether to hide the Docentric print destinations on the Print destination settings form and show only the built-in SSRS print destinations, like Docentric AX is not installed at all. This way Docentric AX is basically deactivated.
You can also choose to show both Docentric and SSRS print destinations on the Print destination settings form, so user can switch between them, or you can choose to show only the Docentric print destinations.
This third option - Use only Docentric print destinations is actually the recommended choice. Since the Docentric print destinations only add additional possibilities to the built-in SSRS print destinations you are safe to go with this option.
Sometimes reports are previewed in SSRS viewer without a possibility to open the Print destination settings form and change the target print destination. For example, Customer invoice or Purchase order are previewed by clicking the Original and Copy Preview buttons from journal forms; the same thing happens when printing Product or Shelf labels.
With the Select template mode combobox you can choose to show all templates (aka designs) on the Print destination settings form, or only those which apply to the current legal entity.
On the other hand, with Show selected templates for multi-selection combobox, you can configure for which print destinations to show Template ID of the selected template on each report dialog form, from which the Print destination settings form can be open. This setting is applicationwide and cross-company, and if you want to change it for a particular report, you can do it via X++ customization.
Temporary files expiration time
When downloading a file from the application in browser, e.g. as in case when printing a report to the File print destination, this file is actually saved as a blob on Azure Blob storage and a temporary link for downloading the file is created and send to the end user. Not only that the download link is temporary but also the file itself – this is how the implementation of temporary files are done in D365FO. You can set Temporary files expiration time within the Azure settings group, a value that applies to both temporary files and their download links used by the Docentric AX framework.
On the other hand, in an on-premises environment temporary files are implemented without Azure Blob storage, and the expiration time of temporary files can be set in the Temporary files expiration time field within the On-premises settings group.
Template data security
1. Apply Legal Entity constraint
Legal Entity data security constraint for Docentric templates can be applied to all users except to those, which are members of the System Administrator or Docentric AX Administrator roles.
All other roles such as Docentric AX Power User and Docentric AX Template Editor will be affected, if this option is turned on – only operations with Docentric designs (aka templates) associated with the current user’s company will be allowed.
For example, a user with the Docentric AX Template Editor role can perform only operations with Docentric designs (aka templates), e.g. add, edit and delete templates associated to any company, if the Apply Legal Entity constraint option is turned off. But if this constraint is applied, then they can add, edit and delete only templates associated to the companies they work for.
Similarly is true for users with the Docentric AX Power User role. They have the same privileges as Docentric AX Administrator but if the Apply Legal Entity constraint option is turned on, then they are able to operate only with Docentric templates associated to the companies they work for, or company-neutral templates, which are used for all companies.
2. Apply custom constraints
Custom data security constraints for Docentric templates implemented in X++ code by a developer can be applied to all users except to those, which are members of the System Administrator or Docentric AX Administrator roles.
Implementation is completely up to you and can be done by subscribing to the DocDataSecurityDelegates.applyCustomDataSecurity delegate and using DocDataSecurityManager class instance provided in this delegate.
SharePoint extended security
D365FO connects to SharePoint using current user Azure AD (Active Directory) credentials. This can be changed by configuring SharePoint extended security settings.
Learn more about SharePoint extended security >>
Diagnostics
In the Diagnostics tab, under the General settings section you can enable error logging to Exceptions log (the built-in SysExceptionTable table). However, this is how logging was done in AX 2012 and Docentric still supports it but for logging report execution errors only.
Collection of diagnostic data, however, is intended to collect diagnostics and usage information which helps us find and fix problems, and improve our product and services. Please check Docentric AX Privacy Policy to learn more.

Use the Environment settings section to configure a custom environment name and mode (Development, Test or Production) for different environment domain URLs.

The record representing the environment you are currently logged into is marked as the Current environment, and the background color of this record is yellow.
Learn more about report Standard placeholders >>
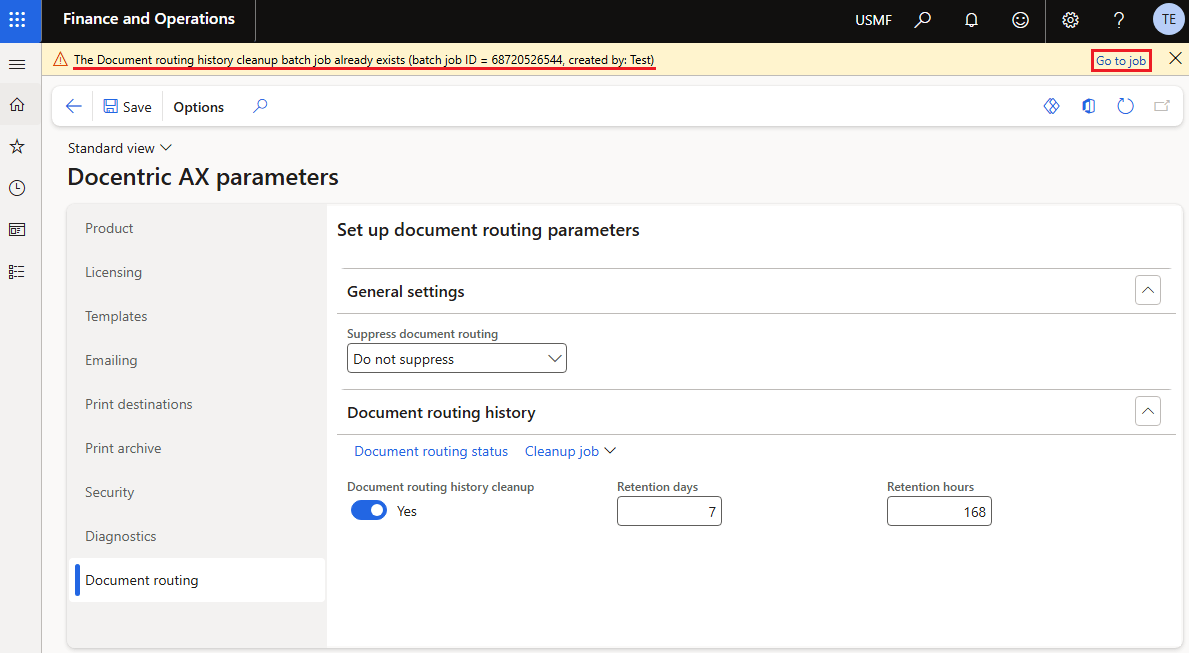
Document routing
General settings
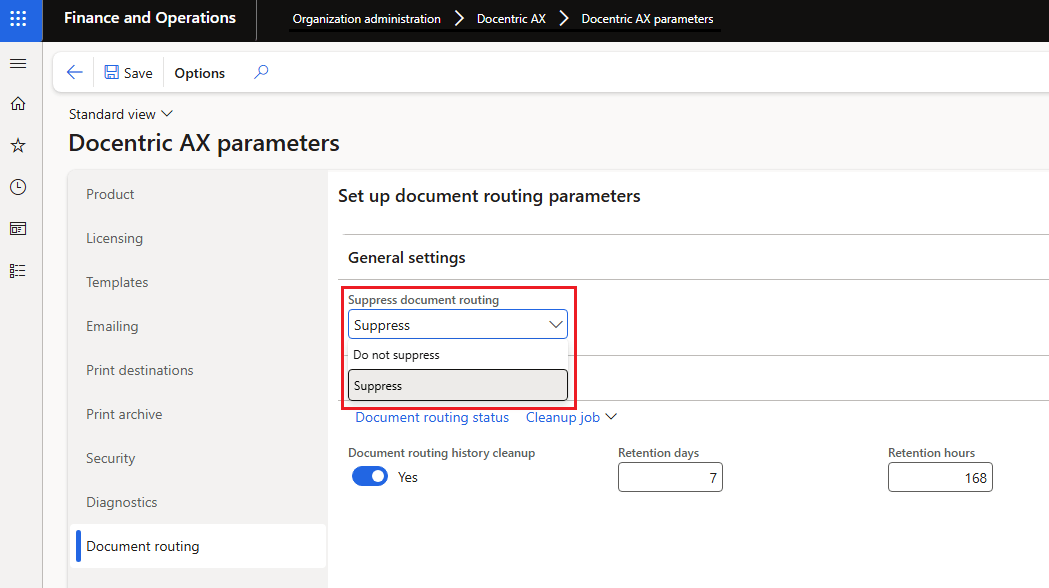
Suppress document routing: If set to Suppress, prevents document routing, instead the resolved printer name will be written to the infolog.
This applies to printing reports to network printers via DRA (document routing agent), as well as printing reports as PDFs via DRA, in both cloud and on-premises environments, when using Docentric Printer print destination.
In addition, it applies to printing Warehouse labels that are based on Docentric templates to network printers (for example, license plate labels).
Suppressing document routing can be useful when migrating the PROD database to UAT for testing, as it will prevent accidental printing of documents to printers.
It can also be used for testing the configured printer placeholders, to see which printer names are resolved when printing a report.
This can be turned off by disabling environment change detection (instructions here).
Document routing history
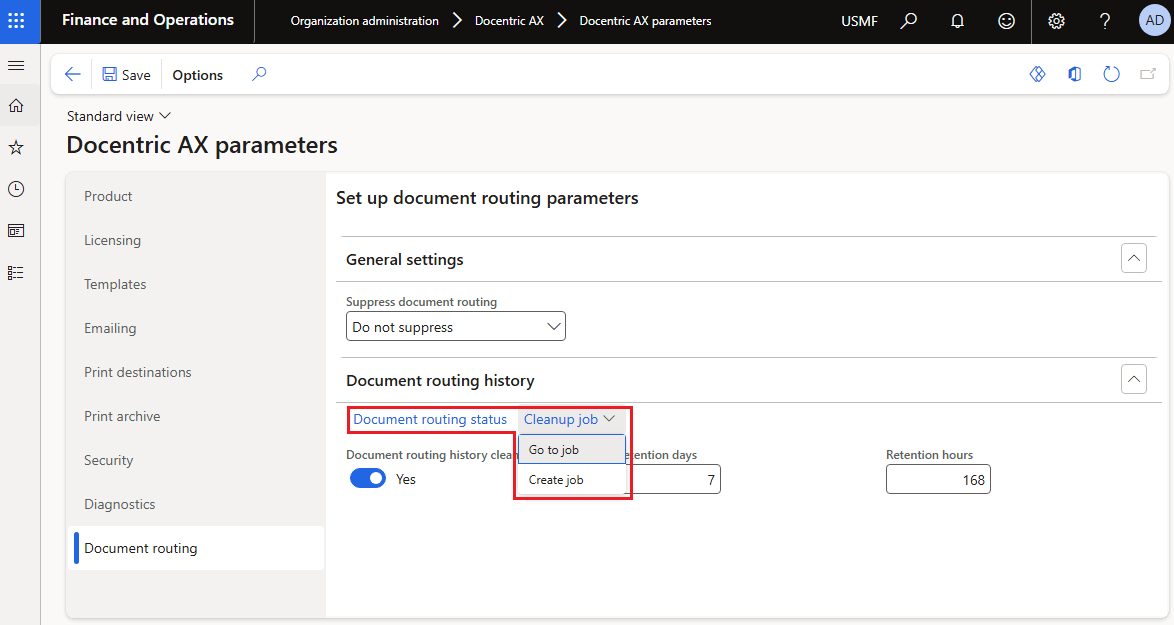
Document routing status: Navigate to the Document routing status form.
Cleanup job > Go to job: Navigate to the System administration > Inquiries > Batch jobs form and select the Document routing history cleanup batch job.
Cleanup job > Create job: Create the Document routing history cleanup batch job.
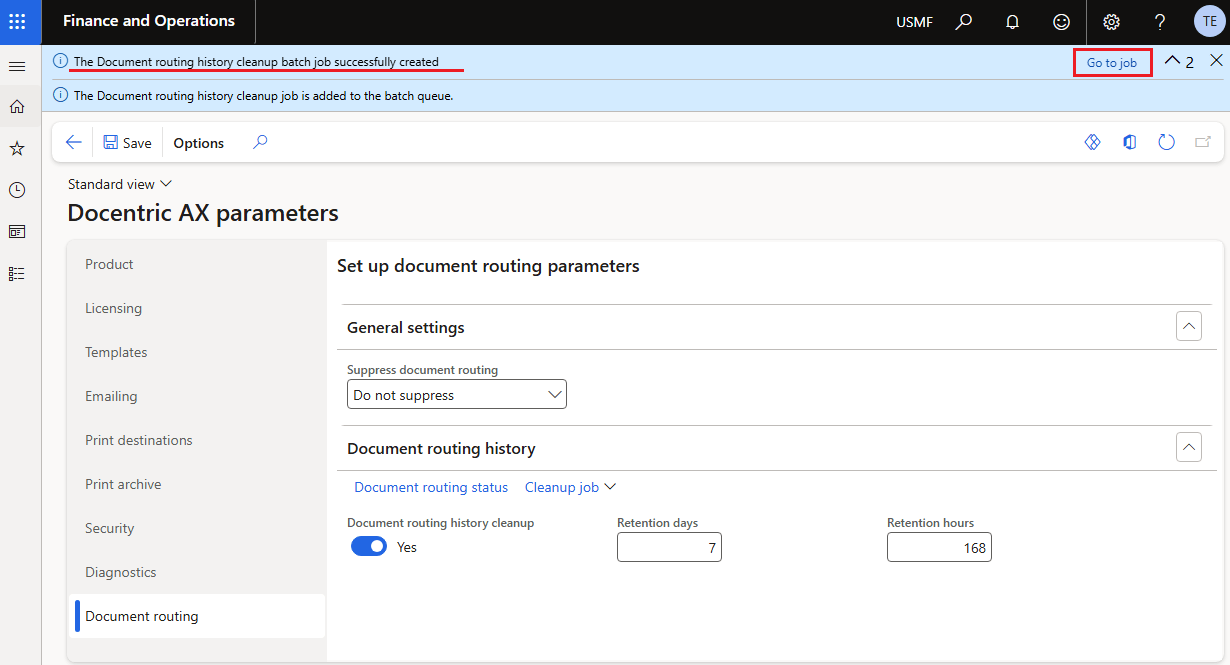
If the Document routing history cleanup batch job already exists, shows the corresponding Batch job ID and the name of the user who created the batch job in the infolog.
The infolog messages also contain an action link that allows you to navigate to the Common > Inquiries > Batch jobs > My batch jobs form, with the Document routing history cleanup batch job selected.

Document routing history cleanup: Turn this checkbox on if you want to apply document retention rules.
Retention days: Set the document retention in days.
Retention hours: Set the document retention in hours.
See also
How to Set Up Reports >>
How to Set Up Report Templates >>
How to Use Deployment Tools >>