
 Tags: D365FO, Email tokens, Emailing, Full Edition, Print destinations, Print management
Introduction
Emailing Customer-facing reports to Contact persons related to Customer in D365FO is not supported by standard email tokens. In this article you will learn how Docentric Advanced email tokens support this scenario without any customization.
Many companies store communication email addresses on Customer Contact persons, not directly on the Customer master record.
For example, Customer account statements might be sent to a finance contact, while other documents go to different recipients.
In this article, we will show how to configure Advanced email tokens so that Customer account statements are automatically sent to Customer Contact persons whose email purpose is Statement.
What you will learn
In this article, you will learn how to:
- Configure Advanced email token to use email addresses from Customer Contact persons, having the Statement purpose.
- Include the fallback logic, i.e., email addresses to be used if the above configured email addresses aren't found.
- Test the token result without running the report.
- Use the token in Docentric Email print destination.
Requirement
Let’s clearly specify the requirement and include two fallback levels.
The goal is to send Customer account statements to:
- Email addresses linked to all Contact persons related to the Customer
- where Purpose = Statement
To make the process reliable, we will also configure fallback logic.
Fallback 1
If no email address with Purpose = Statement exists, the statement should be sent to the Customer primary email address.
For this, additional lines will be added to the Advanced email token configuration.
Fallback 2
If the Advanced email token still does not return any email address, you can configure Email redirection as a final safeguard.
Review available email addresses
Next, let’s review where the email addresses are stored in D365FO.
Open a Customer form:
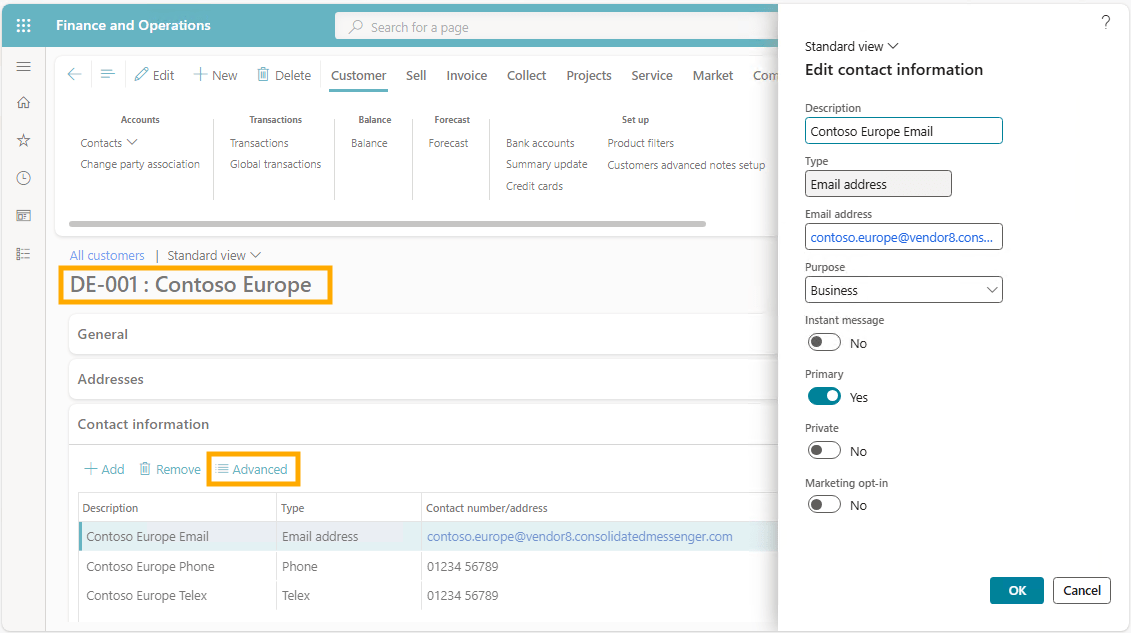
However, for our example we are looking for the Contact persons related to this Customer.
Navigate to Customer > Accounts > Contacts > View contacts, and open one Contact:
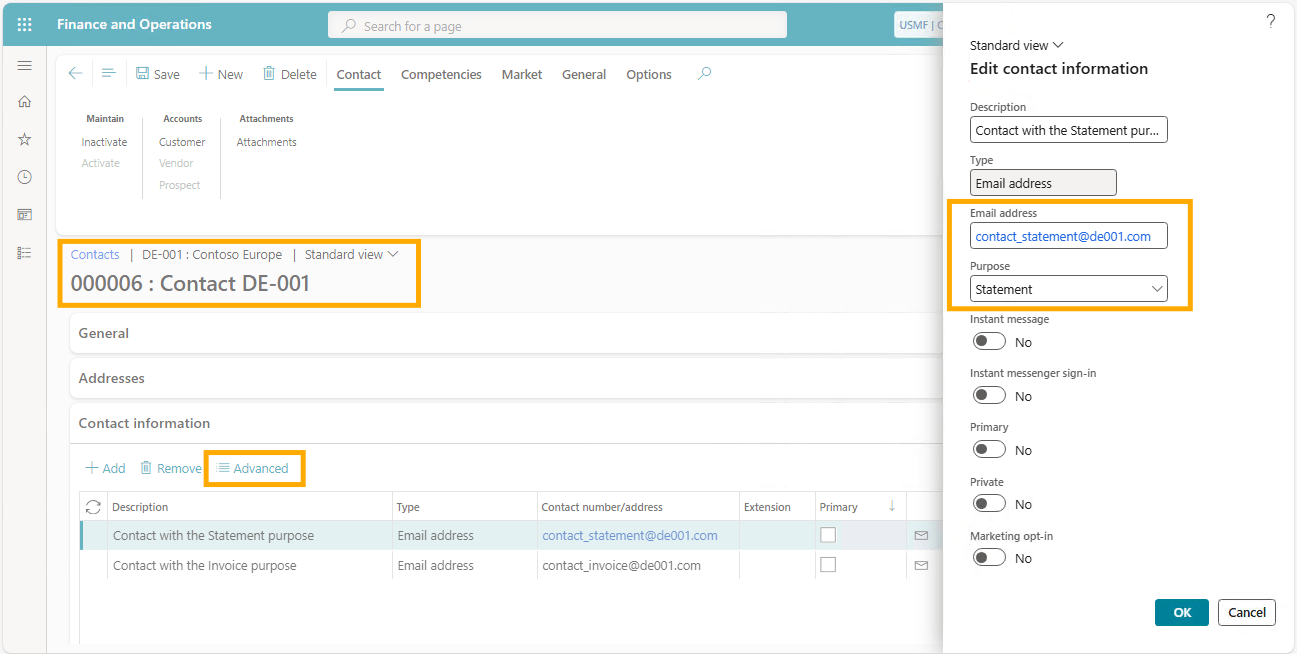
In our example, the Contact person has an email address with the Statement purpose.
Our goal is to configure the Advanced email token to use this address.
Configure Advanced email tokens
Open the Advanced email tokens setup form. You can navigate to it in two ways:
- Go to Docentric AX Workspace > Related > Print management > Advanced email tokens, or
- Go to Organization administration > Docentric AX > Print management > Advanced email tokens.
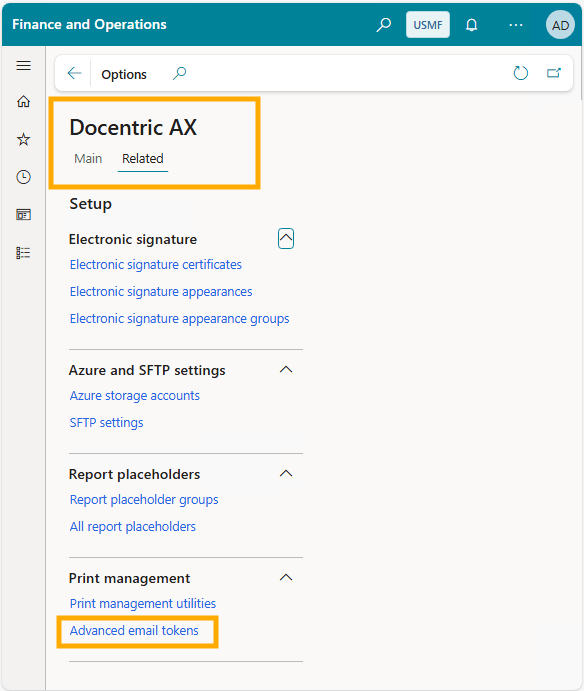
Below is the configuration used for this scenario:
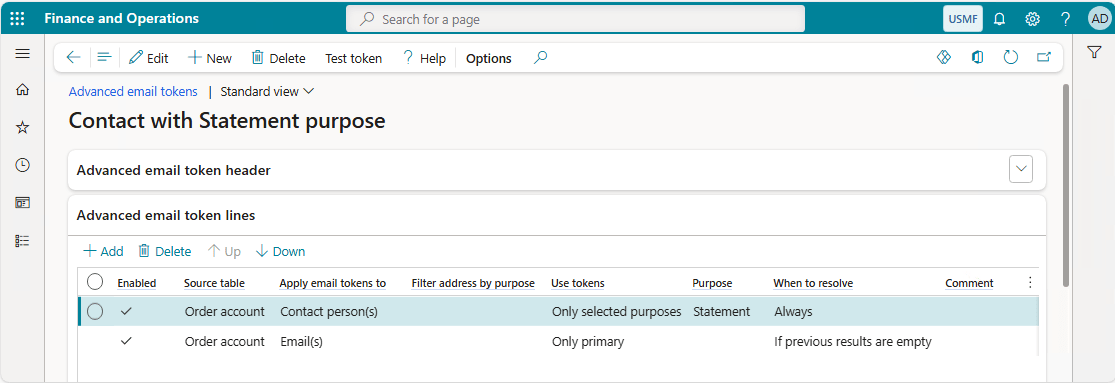
The first configuration line searches for all Contact persons related to the Customer who have email addresses with the Statement purpose.
This line is configured with:
- Source table = Order account. Source table specifies from which record to start looking for the related email addresses. We are looking for some kind of account, but the Source table lookup offers Invoice account and Order account. Which one to choose? For the Customer account statement report, the source table is Order account. Hint: if you are not sure which one is correct, simply configure two lines, one with Order and another with Invoice account, and use the Test functionality to quickly check the result.
- Apply email tokens to = Contact person(s). This instructs the system to look for the Contact persons linked to the Order account for each Customer account statement report being printed.
- Use tokens = Only selected purposes, Purpose = Statement: from all email addresses found on all Contact persons for a given Customer, filter only those having the Statement purpose.
- When to resolve = Always: perform the logic based on this line without any additional condition.
For Customer account statements, the source table is Order account, not Invoice account.
Fallback configuration
The second line defines the fallback scenario.
If the first line returns no result, the system retrieves the Customer primary email address.
This configuration uses:
- Source table = Order account: same starting point as the first line.
- Apply email tokens to = Email(s): look for the email addresses linked to the "starting point", i.e., Order account.
- Purpose = Primary: take only the email address marked as primary.
- When to resolve = If previous results are empty: do this only if the first line didn't return any result.
Test the token without running the report
One of the most useful features of Advanced Email Tokens is the ability to test token resolution without running the report.
Click the Test token button:
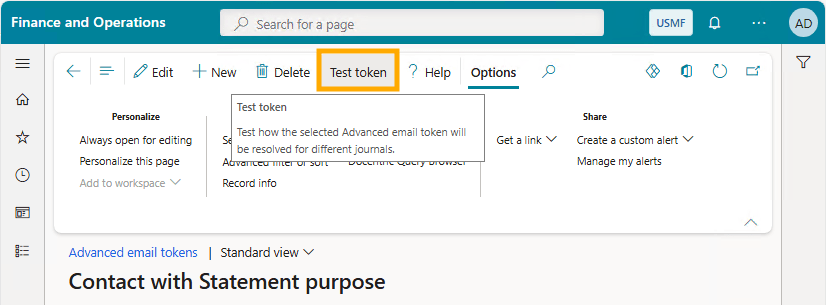
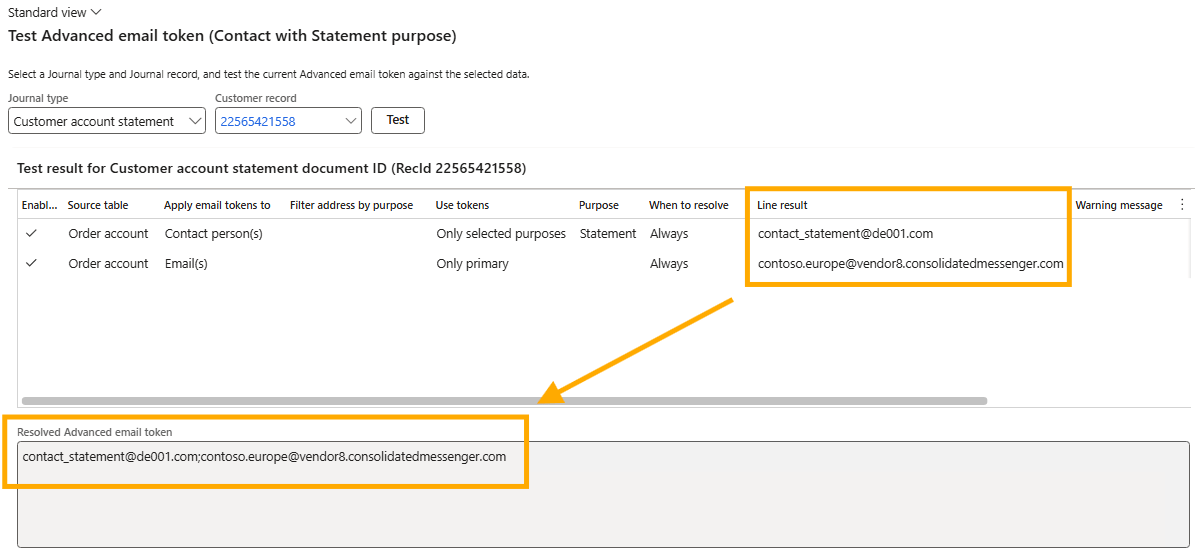
This will open the Test Advanced email token form, where you need to:
- Select Journal type > Customer account statement.
- Select the Customer record against which you want to test the token – DE-001 in this example.
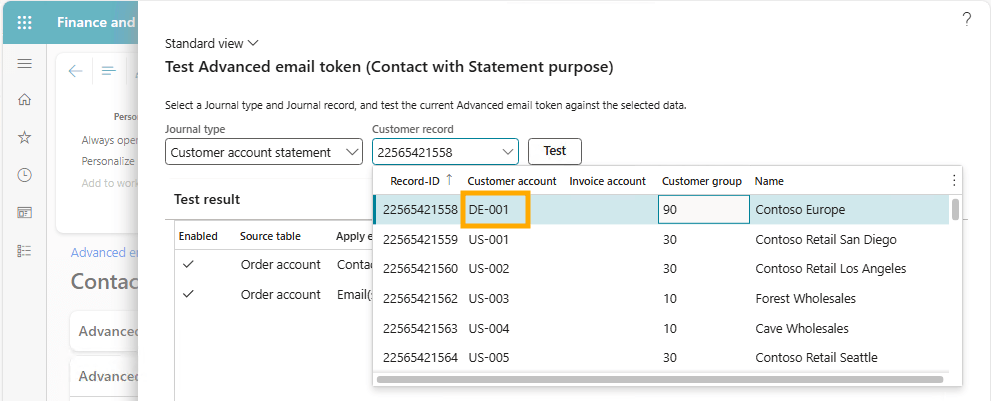
Click the Test button.
The resolved email addresses will be displayed for each token line separately in the Line result field, and then the final (cumulative) result in the Resolved Advanced email token field:
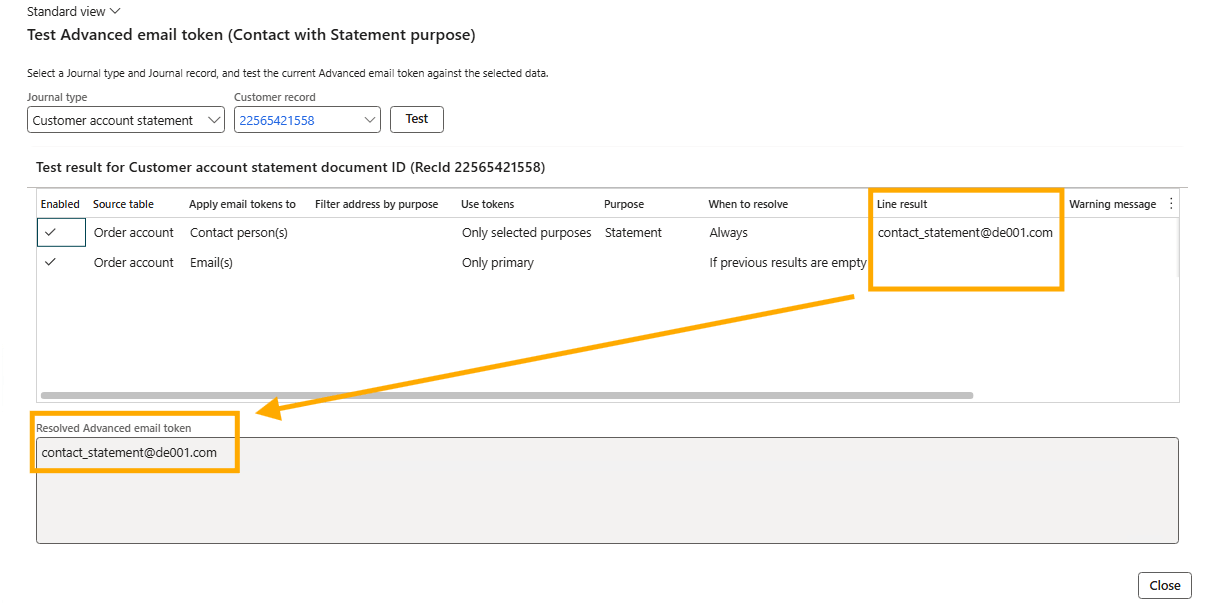
For testing purposes, you can temporarily set When to resolve = Always for all configuration lines. This allows you to see the result of each line:
After testing, remember to restore the desired configuration 😊.
Use the token in Docentric Email print destination
Once the token is configured and tested, the final step is to use it in the Docentric Email print destination for the Customer account statement report.
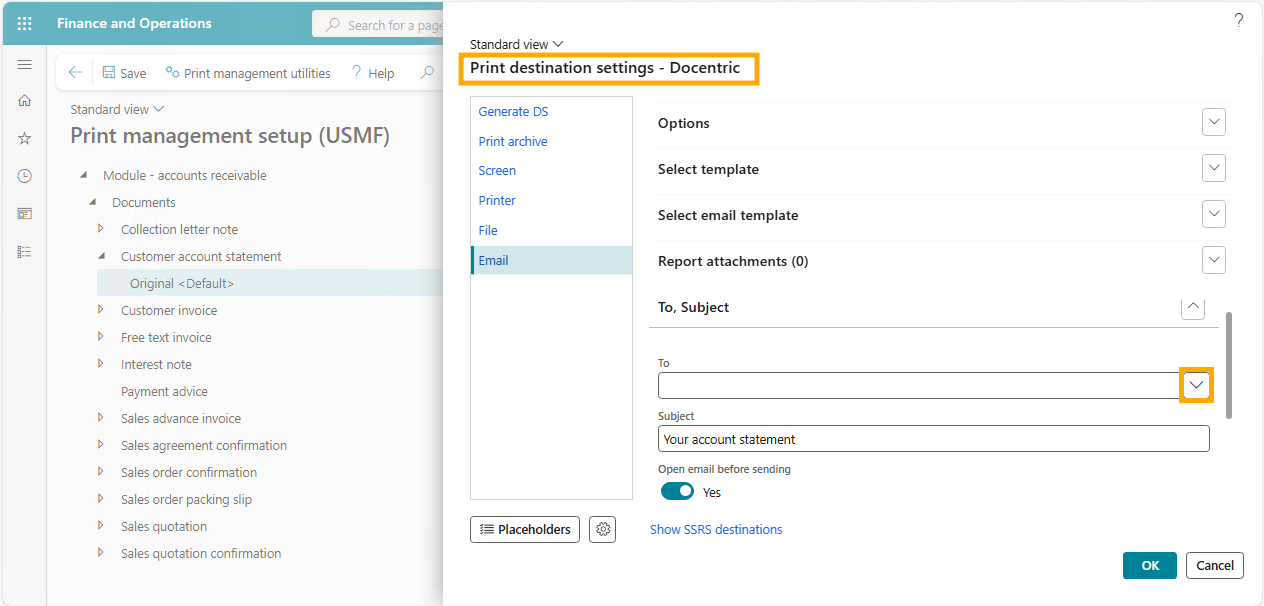
Open the Print management setup for this report and open its Print destination.
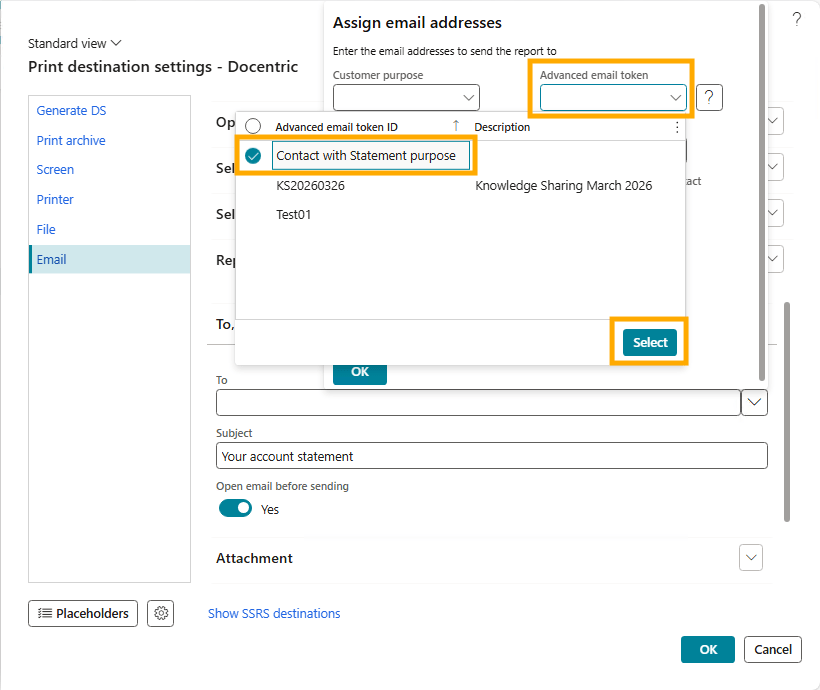
Select Docentric Email print destination and click the down arrow next to the To field, to open the Assign email addresses dialog. Locate the Advanced email token field in the upper-right corner of the Assign email addresses dialog, mark the token you created and click Select.
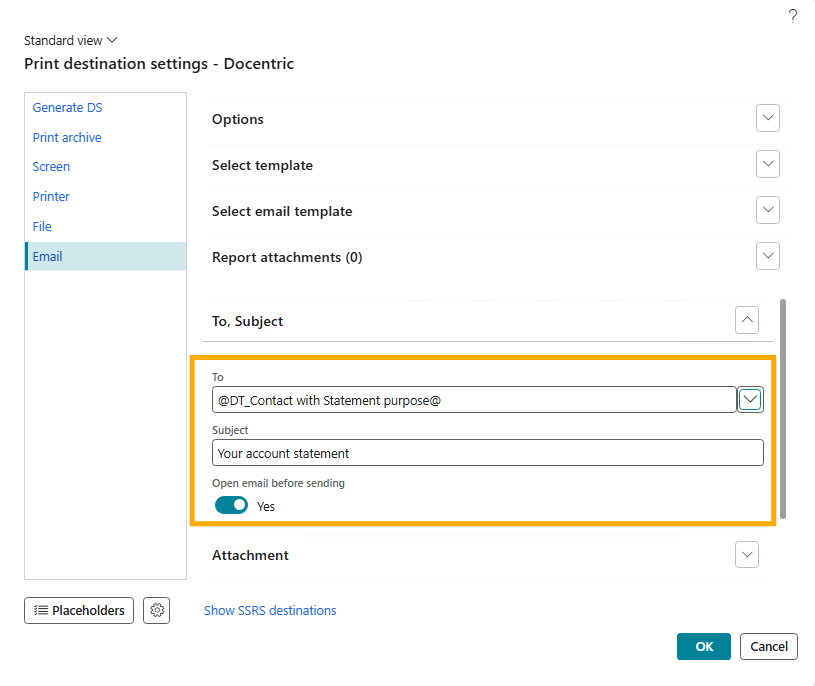
For simpler testing, enable Open email before sending.
The final configuration should look like this:
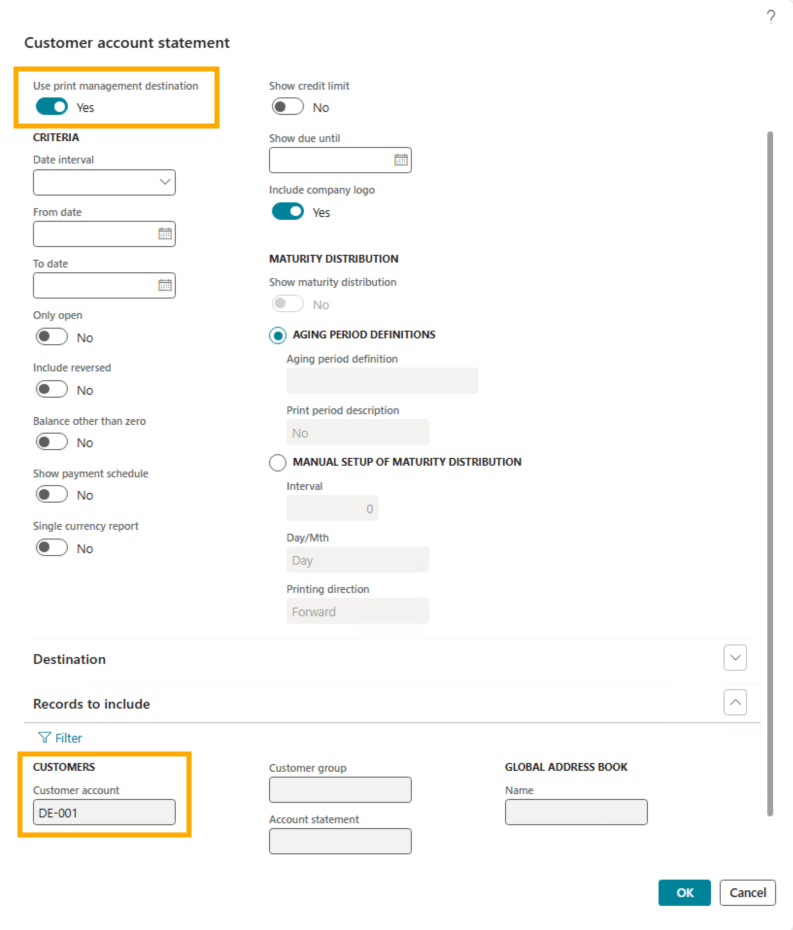
Run the Customer account statement report with:
- Use print management destination enabled
- a filter for Customer account DE-001
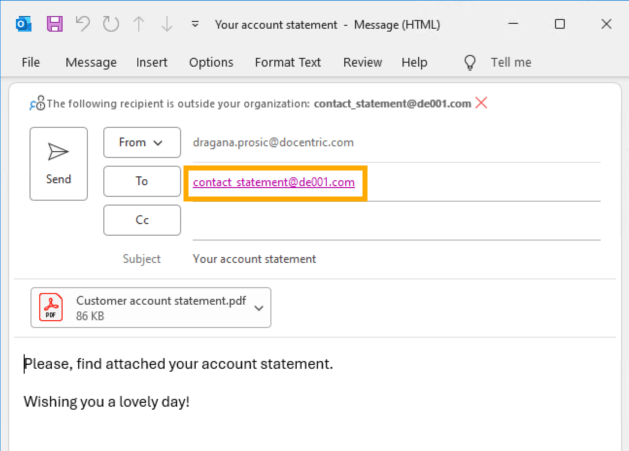
Because you enabled Open email before sending, email message won't be automatically sent, but it will be opened in your email client, where you can confirm that the correct contact email address is set:
Conclusion
Advanced email tokens provide a powerful and flexible way to derive email recipients in D365FO.
With the right configuration, you can retrieve email addresses from a wide range of related records, define fallback logic, and test the setup before running the reports.