How to Install Docentric AX Framework via XPO Files
The goal of this tutorial is to guide you through the installation of Docentric AX Framework via XPO files.
Alternatively, you can also install Docentric AX Framework via model. Learn how >>
It is recommended to install the product in an upper layer in case that we are installing the product for the evaluation purpose. This way the product can be easily removed (by removing the whole layer) after the evaluation has ended.
On the other hand the licensed product should be installed on ISV/VAR/CUS layer; that depends on your strategy.
1. Set the current layer to the USP layer
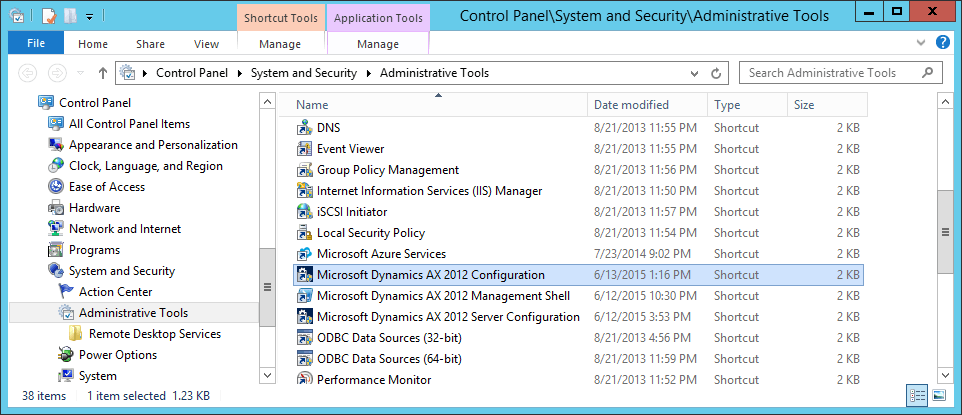
Let’s say we are installing Docentric AX Framework in the USP layer. We need to switch the current application object layer to the USP layer for your AX client to open. Run Microsoft Dynamics AX 2012 Configuration in Control Panel/System and Security/Administrative Tools.
The Microsoft Dynamics AX Configuration Utility form is opened. On the Developer tab set Application object layer to open to USP.

You can read more on how to set the application object layer here.
2. Check if the USP layer already contains objects
Before we proceed we might want to check if there are existing objects in the USP layer so that in the end of the evaluation we can remove the whole layer.
Open the AX client (now in the USP layer) and run the job below.
|
1 2 3 4 5 6 7 8 9 10 11 12 13 14 15 16 17 18 19 20 21 22 23 24 25 26 27 28 29 30 31 32 33 34 35 36 37 38 39 40 41 42 43 44 45 |
static void ObjectsInCurrentLayer(Args _args) { #SysVersionControl UtilEntryLevel curLayer = currentAOLayer(); modelId curModelId = xInfo::getCurrentModelId(); str modelName = SysModelStore::modelId2Name(curModelId); SysModelElementData elemData, parentData; SysModelElement parent, child; TreeNode pNode, cNode; setPrefix('All artifacts in current layer'); // Set options to skip cache lookup of file names infolog.globalCache().set(#VCSCache, #NoPrompt,true); while select RootModelElement from child group by child.RootModelElement, elemData.ModelId join ModelId from elemData where elemData.ModelElement == child.RecId // Layer numbers in SysModel* views are offset by +1 && elemData.Layer == (curLayer + 1) // Remove the following line to include all models && elemData.ModelId == curModelId { // Get lowest layer copy of parent select firstOnly parent order by parentData.Layer where parent.RecId == child.RootModelElement join parentData where parentData.ModelElement == parent.RecId; pNode = SysTreeNode::findNodeInLayer( parent.ElementType, parent.name, 0, parentData.Layer - 1); if(!pNode) continue; if (pNode.AOTLayer() == curLayer) { info(strfmt("%1 %2",pNode.treeNodePath(), modelName)); } } } |
After the job is executed we will get the list of all objects that exist in the USP layer.

3. Import the Docentric_NewArtifacts project
After the pre-preparation steps have been completed, we can go to the next step: importing the project containing all new artifacts of Docentric AX Framework.
Click the Import button of an AOT window and select from the downloaded DocentricAX_xx.zip package the Docentric_NewArtifacts_AX2012_R2_R3.xpo file which contains the Docentric_NewArtifacts project.

After the project has been imported a significant number of the compilation errors will be reported.
![]()
During the re-import of the Docentric_NewArtifacts project click the Yes to all button when the confirmation message box pop ups.

After the second import, the number of compile errors decreases. Among others Variable Docentric has not been declared errors will appear.
![]()
These errors will be removed after two Visual Studio projects within the Docentric_NewArtifacts project are deployed.
4. Deploy Visual Studio projects
In the Docentric_NewArtifacts project there are two Visual Studio projects: DocentricUtilities and DocentricServiceProxy.
Navigate to DocentricUtilities in the Visual Studio CSharp Projects node and click Edit within the contextual menu.

The DocentricUtilities C# project opens in Visual Studio. Rebuild and deploy the project.

At this point, two errors are possible. Deployment can be successfully performed if no AX client and AOS are running. We should close the AX client application and stop the AOS service or, alternatively, we can enable hot-swapping of assemblies for our AOS instance.

Enabling the hot-swapping of assemblies for AOS
Run Microsoft Dynamics AX 2012 Server Configuration in Control Panel/System and Security/Administrative Tools.

The Microsoft Dynamics AX Server Configuration Utility form opens. On the Application Object Server tab check the Enable the hot-swapping of assemblies for each development session checkbox.

By clicking the OK button the AOS service will be restarted.
You can read more on how to enable hot-swapping assemblies here .
After we have closed the AX client application and stopped the AOS service / enableed hot-swapping assemblies, return to the DocentricUtilities and DocentricServiceProxy Visual Studio projects, rebuild and deploy them.


Repeat rebuild and deploy procedure for the second project (the project order is not important).


Open the AX client application. Compile the Docentric_NewArtifacts project. If the Variable Docentric has not been declared error persists, generate incremental CIL and restart the AOS service. The rest of the compilation errors are related to built-in artifacts affected by Docentric AX Framework.

The next step is the import of the Docentric_ChangedArtifacts project containing all the built-in artifacts that are modified by Docentric AX Framework in order to enable integration with built-in SSRS and Document Template Libraries frameworks.
5. Import the Docentric_ChangedArtifacts project
Click the Import button of an AOT window and select from the downloaded DocentricAX_xx.zip package:
- the Docentric_ChangedArtifacts_AX2012_R3_CU13.xpo file, if you have AX 2012 R3 CU13,
- the Docentric_ChangedArtifacts_AX2012_R3_CU12.xpo file, if you have AX 2012 R3 CU12,
- the Docentric_ChangedArtifacts_AX2012_R3_CU11.xpo file, if you have AX 2012 R3 CU11,
- the Docentric_ChangedArtifacts_AX2012_R3_CU10.xpo file, if you have AX 2012 R3 CU10,
- the Docentric_ChangedArtifacts_AX2012_R3_CU9.xpo file, if you have AX 2012 R3 CU9,
- the Docentric_ChangedArtifacts_AX2012_R2_CU8_CU9.xpo file, if you have AX 2012 R2 CU8 or CU9, or
- the Docentric_ChangedArtifacts_AX2012_R2_CU7.xpo file in case you have AX 2012 R2 CU7.
The Docentric_ChangedArtifacts_AX2012_Rx_CUx.xpo file contains the Docentric_ChangedArtifacts project which is AX version dependent. For each artifact from the list you can click the Compare button to see the differences between the original and the modified artifact. You can always compare and merge the artifacts later, after the import.

Click the Yes to all button in the message confirmation box.


Except these four artifacts any of the remaining project artifacts can potentially be changed by both your company and Docentric AX Framework.


6. Import Docentric labels
We have to create at least two Docentric AX label files: an AX label file for the EN-US language and an AX label file for the current AX client language. Let’s say that the (one of) AX client language(s) is a Dutch language. First we will create a new AX label file for the EN-US language named as DOC, from the AxDOCen-us.ald text file.
Select the Label Files node in the AOT and click the Create from File contextual menu item.

Select the AxDOCen-us.ald file and click the Open button.

We have successfully imported the DOC label file for the EN-US language.

Now, we want to import the label file for the Dutch language (NL). Copy the AxDOCen-us.ald file and rename it to AxDOCnl.ald.


Repeat the import of the AxDOCnl.ald file as an AX label file.

The result is shown on the figure below.

You don't have to translate the labels to your language(s) right away, i.e. upfront, but you can do it gradually, label by label, leaving the diagnostic messages for the end. Labels which are not yet translated to your language(s) will appear in the English language.
7. Import the Docentric project
This project is suitable for exploring Docentric AX Framework. Click the Import button of an AOT window and select from the downloaded DocentricAX_xx.zip package the Docentric_AX2012_R2_R3 project. Click the Show details checkbox. You can see that the project contains only project definition, i.e. the Docentric project.

Open the imported project and compile it.
8. The last step
The last step is to synchronize all tables from the Docentric_NewArtifacts and Docentric_ChangedArtifacts projects. Afterwards generate incremental CIL and restart the AOS service. If you have some problems with Print Management report execution, full compile and generating full CIL might be required.
See also
How to Install Docentric AX Framework via Model >>
How to Install Docentric AX Template Designer >>
Docentric AX Framework Setup >>
Download Examples >>