How to Create a Simple Docentric Basic Report
Our goal in this tutorial is to show how to create a simple Docentric Basic report. We will take the following steps:
- Create the report AX artifacts using Basic report wizard:
- a Data Source Provider (DSP) class,
- a Print Report Manager (PRM) class and
- a Report Menu Item.
- Define report parameters by overriding the addParameters() and validateReportParameters() methods of the PRM class
- Generate the report Data Source Package by implementing the generateXmlDataSource() method of the DSP class
- Create and design the report template
Afterwards we will explain how to update a Docentric Basic report. The following steps are required:
- Update the report DSP class
- Regenerate the report Data Source Package
- Update the report template
1. Create new Basic report artifacts
Navigate to Company/System administration/Area page and under the Setup section you will see the Docentric AX menu, specifically the Reporting submenu. The Reporting submenu includes functionalities related to management of both Docentric SSRS and Basic reports.

Let’s say we want to create the ‘Sales Order Preview’ report which will print the sales order for a particular Sales ID provided as a report parameter.
Click the Reports menu item. The Docentric reports form opens. Click the Basic report wizard button and enter PrintSalesOrder as Report ID. Note that the Add as a new Basic report flag is checked by default. This means that after the creation of the report artifacts, a new Basic report will be added to the Reports table.

After clicking the Create report artifacts button, a new project is created and opened.

The project contains the following artifacts:
- PrintSalesOrderDsProvider – the Data Source Provider (DSP) class
- PrintSalesOrderPrintReport – the Print Report Manager (PRM) class.
- PrintSalesOrderRunReport – the Report Menu Item.
Data Source Provider (DSP) class
The wizard has generated a new Data Source Provider class for us but we still have to implement the generateXmlDataSource() method that actually provides the needed data. This method’s responsibility is to collect, calculate and (re)shape the document data as required.

Print Report Manager (PRM) class
A Print Report Manager (PRM) class defines Report ID and the report parameters; it handles report execution from prompting the report dialog form with report parameters and print destinations to running the report. We need to override multiple methods in order to add parameters to the report, to validate them, to change the default design and layout of the report dialog form regarding parameters or to inject a custom business logic in different phases of report execution.

Report Menu Item
Report Menu Item is an Action menu item which points to the report Print Report Manager (PRM) class. When we open it the main() method of the PRM class is invoked. This will result in opening the report dialog form and afterwards printing the report. It is recommended to set at least the Label property of the Report Menu Item.
We can include Report Menu Item in an arbitrary form Design and use one of Form Data Sources as its Data Source. This is the easiest way to set the underlying entity of an executing report, i.e. the Report Execution Context table. The Report Execution Context table is important when, e.g. we want to access its data during report execution or if we want to print a report to its Attachments.

We have set the label of the Report Menu Item to ‘Sales Order Preview’. Others properties have been set by the wizard.
Note that PrintSalesOrder has also been added as a new Basic report since the Add as a new Basic report flag was checked on the Create Basic artifacts wizard form. Also notice that Data source provider class has already been set to the PrintSalesOrderDsProvider DSP class.

Report groups
We will set Sales as the Report group. Report groups provides basic classification of reports.
Report Data Source Package generation options
We can also affect whether:
- Company logo will be included in the report Data Source Package
- Hidden report parameters will be included in the report Data Source Package
- Generate DS print destination will be visible on the report dialog form.
2. Define and validate the report parameters
To design a report template with the Docentric AX designer we need a report data source saved in a physical file. This file is called Docentric Data Source Package (DDSP) file. In other words, to be able to design a template for a report, we need to generate the corresponding DDSP file first.
Open the PrintSalesOrderRunReport report menu item (CTRL + O). The report dialog form is shown.

The report dialog form has been opened but we cannot do anything with it yet. We need to define the report parameters next.

After adding SalesId as a report parameter, save the report PRM class and open the report menu item again.

We can see that Sales ID is rendered as a StringEdit form control which has Lookup & View Details behavior as expected. As all report parameter form controls, this form control is unbound but has its ExtendedDataType property set to the SalesId EDT which points to the SalesTable table in its Relation and Table References properties.
Let’s now introduce a validation rule for the SalesId report parameter.
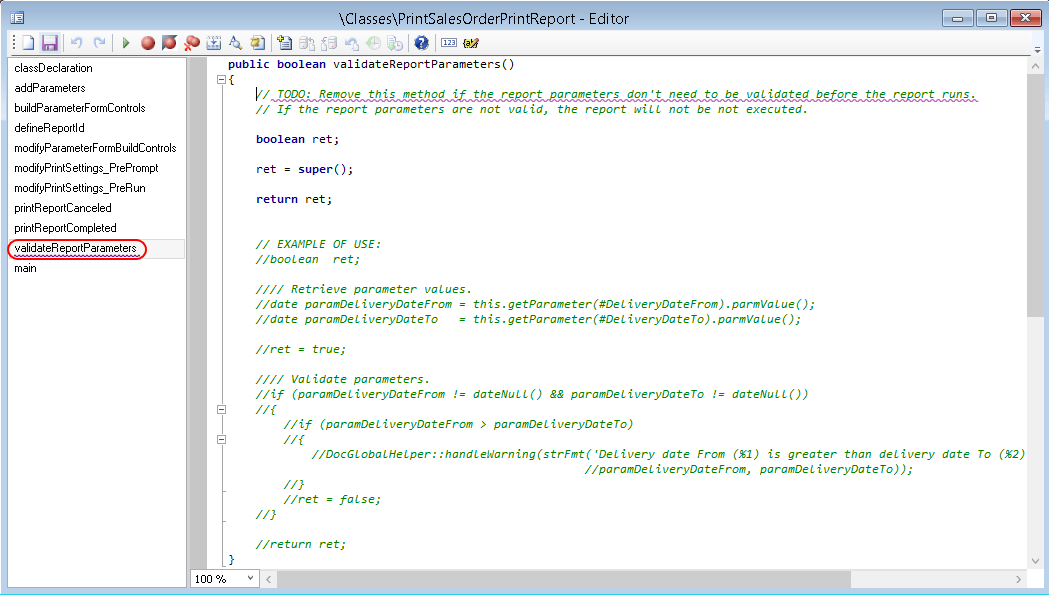
The SalesId report parameter has to be the mandatory parameter. Let’s implement this validation rule in the alidateReportParameters()v method.

Save the PRM class and open the PrintSalesOrderRunReport report menu item (CTRL + O). Click the Print report button on the report dialog form.

The proper validation error occurs.

Let’s try to enter the value for Sales ID report parameter and click the Print report button on the report dialog form again.


Now we got the error that our report has no template. The next step is to create a template for this report. However we cannot design a template without report data source saved to a physical file that is called Data Source Package. Thus we have to generate the report Data Source Package first.
3. Generate the report Data Source Package
To design a report template with the Docentric AX designer we need a report data source saved to a physical file. This file is called Docentric Data Source Package (DDSP) file. In other words, to be able to design a template for a report, we need to generate a corresponding DDSP file first.
Data Source Package generation is available as a special report print destination - Generate DS, and can be hidden if needed through the Generate data source option on the Docentric reports setup form.
Open the PrintSalesOrderRunReport report menu item (CTRL + O) and click the Destinations button on the report dialog form.

The Print destination form opens where we can see that it contains one additional print destination - Generate DS. Specify the file path for the DDSP file and select the language. The selected language will determine which label translations will put into the DDSP file and also be available in the Docentric AX designer.


After we click the Print report button on the report run dialog form, a Data Source Package (DDSP file) for our report is generated and saved to the selected file location.

Click the Open file location button to access the generated DDSP file.

4. Create the template and assign it to the report
4.1. Create and design the report template
Docentric AX report templates are ordinary Word documents. Hence create a new blank Word document and store it on the file system or SharePoint Document Library depending on which template storage type you use. You don’t have to store DDSP files along report template files and neither have to follow any naming convention for them although it is always a good practice to enforce one.

Open the newly created Word document, click the Use As Template button on the Docentric AX ribbon and load the generated DDSP (Docentric Data Source Package) file.

Template design takes place in Docentric AX Template Designer, which is actually MS Word with a special Add-In. In the Data Source pane we can see the report data source schema as defined by the Data Source Package and that is at our disposal for template design. Notice that Docentric AX Framework automatically adds some common or general data (such as company or current worker) that might be used on any template.

Let’s start by inserting a new Field tagging element that will be bound to the SalesId parameter from the Parameters data section in the report data source.

We could add other needed tagging elements and content, and complete the template design. But since we haven’t defined the business logic in our Data Source Provider (DSP) class yet, we are leaving the template design for now. Before continuing with the template design let’s make the report work, by ensuring that it properly executes from the report dialog form to printing to a selected print destination.
Click the Preview button on Docentric AX ribbon to preview the report.

Check here for the step-by-step tutorial on how to design a similar template.
4.2. Assign the template to the report
The next step is to assign the newly created template to the Birthdays (HcmBirthday.Report) report. Open the Reports form, select the PrintSalesOrder report and click the Add button on the Report templates tab page.

On the Report template form click the marked button and select the report template file.


The new template with PrintSalesOrder as Template ID is added to Report templates of the report as its default template.

The Is default flag is applied to all templates with the same Template ID. This means that the default template is determined considering the Is default flag in the report setup, the current company and the selected Language on the report dialog form. If Language is omitted, the current user language is used.
After the template is assigned to the Sales Order Preview report, print the report to Screen.


5. Update the report
5.1. Update the report DSP class
The wizard has generated a new Data Source Provider (DSP) class for us but we still have to implement the generateXmlDataSource() method that actually provides the needed data. This method’s responsibility is to collect, calculate and (re)shape the report data as required.
So far, we haven’t provide any implementation. Still, we were able to initially design the report template. This was possible because the base implementation of the generateXmlDataSource() method always generates a Docentric Data Source (DDSP file) containing at least the report caption, report parameters and general/common data (current company and worker related data).
Open the PrintSalesOrderDsProvider class in the editor and implement the generateXmlDataSource() method so that the sales order selected by the Sales ID report parameter is included, together with its sales lines. You can learn here on how to write a DSP class.

As you can see on the picture above, we have implemented our key method with just a few lines of code.
5.2. Regenerate the report Data Source Package
When the generateXmlDataSource() method of the DSP class is implemented, we need to regenerate the report Data Source Package (DDSP file). We can do this in the same way we’ve done it initially – by opening the report menu item that opens the report dialog form and selecting the Generate DS print destination.

Click the Print report button on the report dialog form. The report Data Source Package is generated.

5.3. Update the report template
On the Reports form and select the default template for the PrintSalesOrder report. Click the Design button on the Report template action pane.

The report template opens. We can also open it from its location just like we would open any other Word document.

Click the Load Data Source button on the Docentric AX ribbon tab in MS Word. Locate and open the regenerated report Data Source Package. Before you do that, note that the template data source does not contain any data in the MainData data section apart from the ReportCaption data field. And after the template data source is refreshed, all fields of the SalesTable record will appear in the Data Source pane. Now we can finally get started with template design.

We can also use the built-in XML editor to view and modify the sample template data (actually the data from the data source) in order to test the different aspects of the template. This is particularly useful when we use conditional rendering, e.g. in case that a report parameter has a particular value some report part should be visible and other shouldn’t.
Note that Docentric AX Framework automatically adds some common or general data (such as company or current worker) that might be used on every template. You can learn more about design-time Docentric Data Source Packages (DDSP files) here.

Assume that we have finished with the template design. You can see a detailed a step-by-step tutorial on how to design a similar template here .
Click the Preview button on the Docentric AX ribbon tab in MS Word to preview the report.

Now let’s run the report from the report dialog form. Open the report menu item and select Screen as the print destination. Select an arbitrary value for the Sales ID parameter. Click the Print report button. The report opens in the embedded XPS viewer.


6. Conclusion
We have used the wizard to generate a new Basic report artifacts. The wizard has also registered the report as Docentric Report.
We have implemented the generateXmlDataSource() method of the report (Data Source Provider) DSP class to provide the data needed for a report. Afterwards the template of the report has been designed and assigned to the report in the report setup.
We have also implemented the addParameters() and validateReportParameters() methods of the Print Report Manager (PRM) class to add and validate the report paramters.

Additionally, you can have complete control over report execution by injecting your custom business logic at various execution points. About report execution hooks you can learn here.
Resources
Data Source Provider (DSP) class, Print Report Manager (PRM) class and Report Menu Item Data source (DDSP file) SalesOrderPreview Template
See also
How to Use Labels with Reports >>
Report Setup in Detail >>
How to Create a Complex Report Dialog Form >>
How to Use More Than One Template for a Report >>
Download Basic Report Examples >>
How to Design Templates with Docentric AX Template Designer >>
Explore Improved Report Print Destinations >>
How to Write a Data Source Provider Class >>
IN THIS ARTICLE
- 1. Create new Basic report artifacts
- 2. Define and validate the report parameters
- 3. Generate the report Data Source Package
- 4. Create the template and assign it to the report
- 4.1. Create and design the report template
- 4.2. Assign the template to the report
- 5. Update the report
- 5.1. Update the report DSP class
- 5.2. Regenerate the report Data Source Package
- 5.3. Update the report template
- 6. Conclusion
- Resources
- See also