Using Var and Context Tagging Elements
Starting with Docentric AX Designer version 6.0.25 and Docentric AX version 3.3.4, there are two new tagging elements available: Var and Context. These two tagging elements have been introduced primarily to be able to display current context information in headers and footers.
Use-case scenario
Suppose that we want to create a Production order report, with the following requirements:
- The report contains one or more production or batch orders
- Each of the production or batch orders contains:
- Header information
- Table of required products
- Table of product operations
- If individual production or batch order spans over several pages:
- Each page should repeat the current production or batch order in the header
- Page numbering within each production or batch order should be implemented in the footer and it should reset with each subsequent production or batch order
We are going to modify the Production order report which comes with Docentric replicas and we will be using the same DDSP data which come with this template.
Template design layout
The following image contains layout plan for our target report template:

Template design steps
Let’s now redesign our template step-by-step using the Designer. We will start with the ProdReport_Report template.docx, which is part of the Docentric Replicas and can be downloaded from here >>
Step 1: Outer list
The outer list will create a collection of individual production or batch orders.
We’ll show hidden formatting symbols by clicking the button with paragraph symbol in the Home ribbon. Now we will delete the Page Brake formatting symbol and insert Continuous Section Break instead. This way we’ll get a new section for each production or batch order, allowing us to have different headers and footers for each section, which is exactly what we want.
The images below show how to insert section break.


Step 2: Insert the Var tagging element
The Var tagging element is used to declare a variable and bind it to some data node from the DDSP file. The bound node can also include children. Typically it is bound to the Current Data Context, meaning that the variable will point to the data which are in the current data context scope. Variable, declared in this way must have a name, by which it can be referenced.
In our scenario we will insert the Var tagging element in the outer List tagging element, so that it will contain the data from the current production or batch order. We will then be able to use this data in the section header and footer with the help of our variable.
We will insert the Var tagging element just above the product list. It will be bound to the Current Data Context, as shown in the image below. The name of the variable will be HeaderCtx.


OK, the variable is now ready to use.
Step 3: Section footer
Section footer will contain page numbering information and session date and time. Currently this information is in the header, so we are first going to cut and paste header contents into the footer.

Next we will modify page numbering. Page number will have to be reset within each new section. Total page numbers will be replaced with SectionPages Word dynamic field.


Step 4: Section header
Existing table with production or batch order information from the report body should now be moved into the header. This way, the production or batch order information will be repeated on next page(s) if there will be more than one page of information for the same production or batch order.
First we are going to select the content which will be moved to the header and cut and paste it into the header area. Make sure that you don’t select the Var tagging element, displayed as (x) on the screen!

After pasting it into the header we will select the content of the header and click the Context tagging element to include the whole header content into the Context boundaries.

We will now bind the Context tagging element to the variable HeaderCtx. This will change the Current Data Context of header elements to the contents of the HeaderCtx variable – which contains the current production or batch order information.
Context tagging element is bound to the variable by using XPath function var-element-value('variable-name') which accepts a string parameter with the variable name.

Step 5: Check if there are any elements with broken binding
If you followed along the instruction in this manual, you should have no broken bindings by now. Broken bindings are recognized by red squares with exclamation marks next to the nodes in the Element Tree explorer. In our case everything is resolved.

If we have to fix any broken bindings or if we insert new Docentric AX tagging elements, we should make sure that we bind them to the data nodes in the Current Data Context. See the image below to see how to do it.

Step 6: Testing
Let’s test the report if it displays correctly. It should look like the one on the image below.

Adding more data to test multiple pages for the same order
The current DDSP file which is used to test the report doesn’t contain enough data for any single production or batch order to be printed over several pages. So we are going to multiply process operations data manually, so that we’ll get more data and trigger a page brake.
There is a handy feature in the Data Source pane window where we can modify the DDSP data. Just select one of the data sources (Parameters, MainData or GeneralData) and click the icon which opens this data source in the built-in editor.

We are going to find process operation data for one of the production or batch orders in the editor, select it and multiply it twice using copy-paste operation. We have to be careful to properly select XML nodes and to properly copy them, so that the XML structure will still be valid.
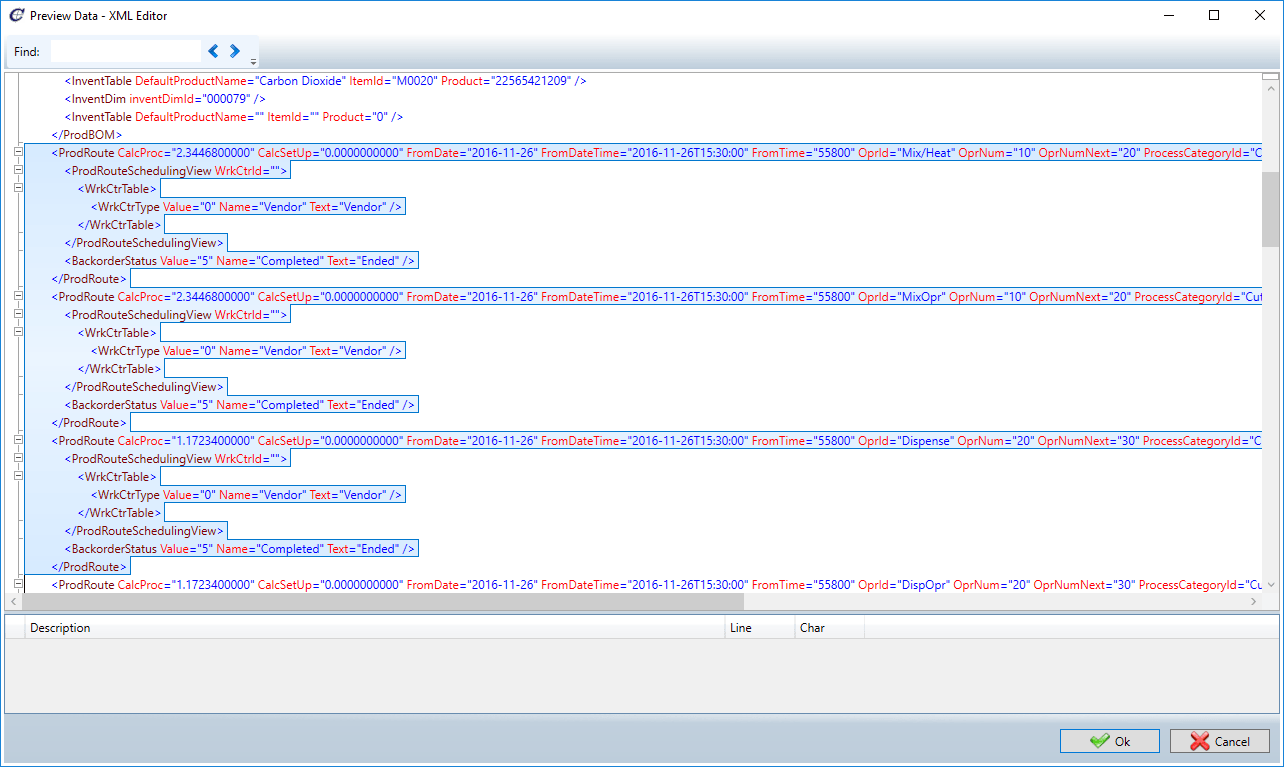
When we are done we click the OK button in the editor to save changes. Now let’s run the report again.
The result should be like on the images below. First two images show two pages with information from the same production order and we see that headers are repeated and that the page numbering works as expected. Third image shows a different, one-page production order with header and footer as expected.


Resources
Zip file with data source (DDSP file) and report template (DOCX file)