How to Develop a New SSRS Report
You can develop a new custom SSRS report from scratch in the standard way – by creating all needed report artifacts including report temporary tables, business logic in a RDP class to fill them, report data contract class, etc. If you are positive that you will never need a standard SSRS report design, then you don’t have to design it neither to deploy it; still the new report has to exist in AOT. From this point onwards you can handle the new report as any other existing SSRS that is improved with Docentric AX. See how >>
On the other hand if you want to define and fetch all needed data for a new SSRS report but without spending time on creating report temporary tables, and at the same time you want to have an ability to arbitrary shape your data, e.g. to nest them on multiple levels, you can choose a different approach. This tutorial will guide you how to do it.
Let’s say that we need to develop a new report showing all purchase orders that are invoiced in the given period. Parameters for the report should be From and To date, and there is also a flag that represents whether only the big orders should be considered for the report.
1. Creation of dummy SSRS report artifacts
First, we need to create some of the standard SSRS report artifacts as dummy artifacts in order to be able to override the new SSRS report with a Docentric template and custom Docentric DSP (Data Source Provider) class.
Take a look at the following project.

Our goal is to create all artifacts from this project. First, we need to create a dummy RDP data provider, the DocDummySSRSDP class, with no X++ logic. This class refers to the DocDummySSSRContract class as report data cotract class created in the next step.
|
1 2 3 4 5 6 7 8 9 10 11 12 13 14 15 16 17 18 19 20 21 22 23 24 |
[ SRSReportParameterAttribute(classstr(DocDummySSSRContract)) ] class DocDummySSRSDP extends SRSReportDataProviderBase { TmpRecId dummyTmp; } // A dummy report temporary table that actually is not going to be used. // Still, it has to be declared because a dummy SSRS Report Design demands an existing data set. [ SRSReportDataSetAttribute('TmpRecId') ] public TmpRecId getTmpDummyTable() { select dummyTmp; return dummyTmp; } // This method should stay empty since there is no report temporary table to be filled. [AifDocumentCreateAttribute, SysEntryPointAttribute(true)] public void processReport() { } |
Second, we need to define the report parameters using a RDP contract class. Actually, among all SSRS classes (controller, data provider and contract), we only have to create a meaningful report data contract class because of parameters:
|
1 2 3 4 5 6 7 8 9 10 11 12 13 14 15 16 17 18 19 20 21 22 23 24 25 26 27 28 29 30 31 32 33 34 35 36 37 38 39 40 41 42 43 44 45 |
[ DataContractAttribute, SysOperationGroupAttribute('Date', "@SYS7402", '1', FormArrangeMethod::HorizontalFlushRight) ] public class DocDummySSSRContract implements SysOperationValidatable, SysOperationInitializable { TransDate fromDate; TransDate toDate; boolean includeOnlyBigOrders; // > 100K } [ DataMemberAttribute('FromDate'), SysOperationLabelAttribute(literalstr("@SYS4083")), SysOperationGroupMemberAttribute('Date'), SysOperationDisplayOrderAttribute('1') ] public TransDate parmFromDate(TransDate _fromDate = fromDate) { fromDate = _fromDate; return fromDate; } [ DataMemberAttribute('IncludeOnlyBigOrders'), SysOperationLabelAttribute('Only big orders'), SysOperationDisplayOrderAttribute('3') ] public boolean parmIncludeOnlyBigOrders(boolean _includeOnlyBigOrders = includeOnlyBigOrders) { includeOnlyBigOrders = _includeOnlyBigOrders; return includeOnlyBigOrders; } [ DataMemberAttribute('ToDate'), SysOperationLabelAttribute(literalstr("@SYS8828")), SysOperationGroupMemberAttribute('Date'), SysOperationDisplayOrderAttribute('2') ] public TransDate parmToDate(TransDate _toDate = toDate) { toDate = _toDate; return toDate; } |
In the end of tutorial you can download the whole implementation of this and other classes.
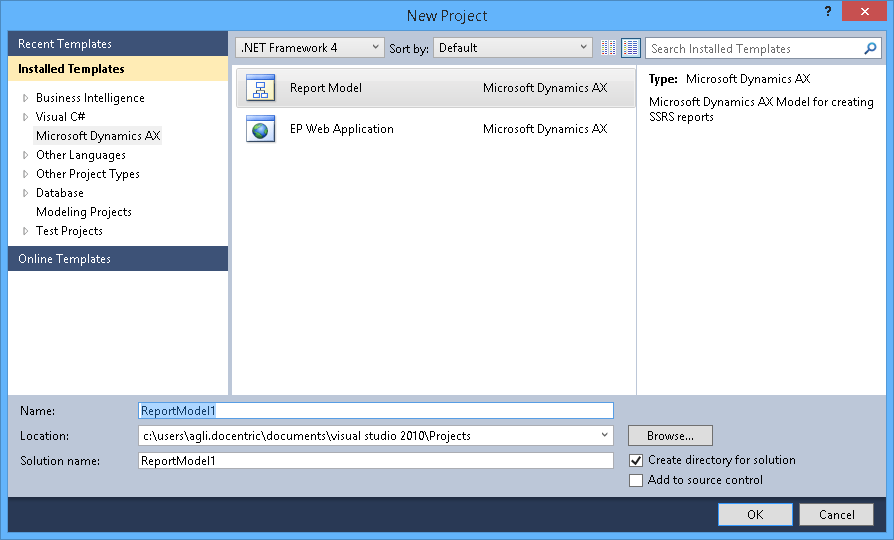
The next step is to create a new SSRS report desing. Open Visual Studio and create a new project from the Report Model template under Microsoft Dynamics AX category.
In Solution Explorer select the project and add a new report. Rename it to DocDummySSRSReport. In the main VS window select DocDummySSRSReport and add a new dataset with a name DummyTmpTable. Select Report Data Provider as its Data Source Type, and afterwards click on the Query property in the Properties window, in order to select DocDummySSRSDP as RDP class.
Then select Designs node in the main VS window and add a new Auto Design. Rename it to Report and add a new Table. Set DummyTmpTable as a DataSet of Table in the Properties window.
Compile the report; it gets automatically added to AOT.


In the end create a new Display menu item, DocDummySSRSReport, which is linked to the newly created SSRS report design.
2. Register dummy SSRS report as Docentric report
Once we have a dummy SSRS report in AOT, next we need to do is to register this SSRS report to act as a Docentric report.
Navigate to Company/System administration/Area page and under Setup section you will see the Docentric AX menu, specifically the Reporting submenu. The Reporting submenu includes functionalities related to management of both Docentric SSRS and Basic reports.

Click the Reports menu item. The Docentric reports form opens. Click the New SRS report button and select DocDummySSRSReport as SRS report name and Report as Report design name.

After a SSRS report is registered, it is automatically validated. We get the following validation error: 'The report has no template assigned'. We will assign a template as soon as we create a Docentric Data Source Provider class and generate Data Source Package (DDSP file) for the report. Also, we need to activate the report by clicking the Activate button.

3. Create custom Docentric Data Source Provider class
When we register a SSRS report as Docentric report, by default the base DSP class for Docentric SSRS reports (DocDataSourceProviderSrsReporting) is used. This class automatically builds Docentric Data Source Package (DDSP file) by reusing the RDP artifacts of the report.
But in this case when we are creating a report from scratch and there is neither the real RDP class nor temporary tables, we are going to need a custom Docentric DSP class to put down our logic that fetches and shapes the data needed for the report.
We will create a custom DSP (Data Source Provider) class with the help of the wizard. Click the Create data source provider class button. The Create SRS report artifacts form is open.

After we enter the names of artifacts and click the Create report artifacts button, a temporary private project with the DSP class is created and this class (DocDummySSRSReportReportDsProvider) is assigned as Data source provider class of the report.

Open the DocDummySSRSReportReportDsProvider class in the editor and delete the following two methods: addDataFieldsForRdpTableRecord() and overrideReportRunSettings() because we do not need them for this scenario. Then implement the generateXmlDataSource() method so that all needed data are included:
|
1 2 3 4 5 6 7 8 9 10 11 12 13 14 15 16 17 18 19 20 21 22 23 24 25 26 27 28 |
protected void generateXmlDataSource(DocXmlRecordBuilder _recordBuilder) { PurchTable purchTable; DocDummySSSRContract reportContract = this.getSrsRdpContract(); TransDate fromDate = reportContract.parmFromDate(); TransDate toDate = reportContract.parmToDate(); boolean includeOnlyBigOrders = reportContract.parmIncludeOnlyBigOrders(); // Add all purch orders that are invoiced in the given interval. while select purchTable where purchTable.PurchStatus == PurchStatus::Invoiced && (fromDate == dateNull() || purchTable.DeliveryDate >= fromDate) && (toDate == dateNull() || purchTable.DeliveryDate <= toDate) { // Skip all orders that are not big, if the includeOnlyBigOrders parameter is set to True. if (includeOnlyBigOrders && purchTable.amountInvoiced() <= 100000) { continue; } // Include the current PurchTable record including all fields. _recordBuilder.addRecordWithAllFields(purchTable); // Include the amountInvoiced() display method as additional data field. _recordBuilder.addDisplayMethod(tableMethodStr(PurchTable, amountInvoiced)); } } |
Learn how to write a DSP class and use Docentric AX APIs in detail >>
4. Generate Docentric Data Source Package (DDSP file)
The next step is to generate Docentric Data Source Package (DDSP file) for the report. This file will contain all data we added to Record Builder in the generateXmlDataSource() method.
Open the report dialog form by opening the report menu item - DocDummySSRSReport (CTRL + O). On the form there are rendered report parameters defined by the report contract class (DocDummySSSRContract): From and To date and the Include only big orders flag. Click the Destinations button.

Generation of DDSP file is handled by using the new Generate DS print destination. Beside the DDSP file location you can also select the main design language as Language as well as so called Preview Languages.
Learn more on how to use labels with reports >>

After we selected Generate DS as the target print destination for the report, click the OK button on the report dialog from. The Docentric Data Source Package for the report is generated.

5. Design template
Create a new Word document, or open the already prepared starting template for all your business documents. Click the Use As Template button on the Docentric AX ribbon and load the report DDSP (Docentric Data Source Package) file.

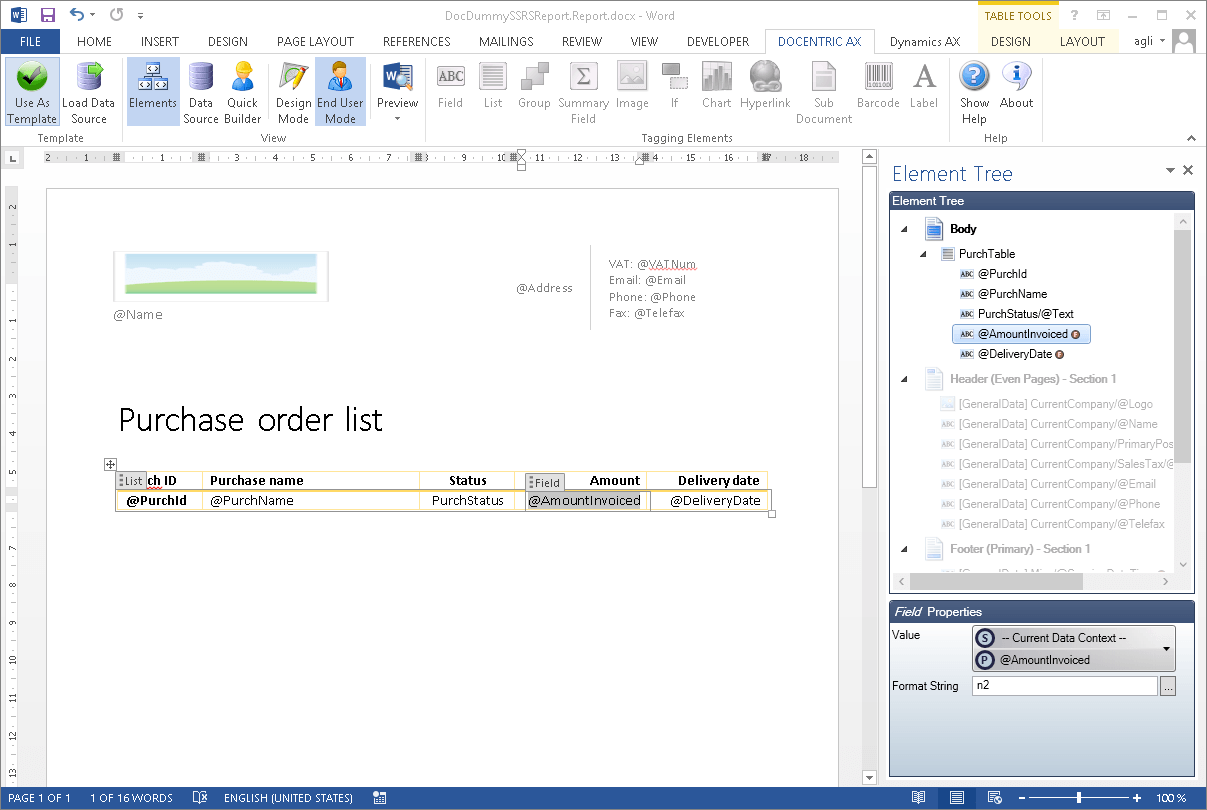
Template design takes place in Docentric AX Template Designer, which is actually MS Word with a special Add-In. In the Data Source pane we can see the report data source schema as defined by the Data Source Package, i.e. the report DSP class, and that is at our disposal for template design. Notice that Docentric AX Framework automatically adds some common or general data (such as current company and worker) that might be used on every template.

You can also see in the Data Source pane the additionally added data field AmountInvoiced that was added through the display method of the PurchTable table.
Let’s design the template. The finished template looks like the following:
Learn on how to design Docentric templates >>
When you click the Preview button on the Docentric AX ribbon, you will see how the printed report looks like. This way you can test your report while designing it without leaving MS Word.

6. Assign template to report
After we designed the template, we need to assign it to the report. Open the Docentric reports form again and select the DocDummySSRSReport.Report report. Click the Add button from the Report templates action pane. The Report template form is open. Locate the report template and click the OK button.

Afterwards validate the report by clicking the Validate button in the main action pane of the form. The report appears as valid. Note that it uses a custom DSP class (DocDummySSRSReportReportDsProvider) that we created in the Step 3 instead of the base DSP class for Docentric Reports (DocDataSourceProviderSrsReporting).

7. Print report
The last step is to check if our new report is working. Open the report dialog form by opening the report menu item DocDummySSRSReport (CTRL + O). Select the different target print destination than Generate DS, e.g. Screen (Docentric).

Click the OK button on the report dialog form. The report runs on screen.

Resources
Report artifacts Data source (DDSP file)
Report Template
See also
How to Write a Data Source Provider Class >>
SSRS Report Examples >>
How to Use a Print Management SSRS report as Docentric Report >>
How to Use a Built-in SSRS Report as Docentric Report >>
How to Design Docentric Reports >>