
 Tags: D365FO, Full Edition, Print destinations, SFTP
Need to drop hundreds of invoices into a bank’s secure inbox before the end of the day? Or push documents to tax authorities that still swear by file transfers?
SFTP is still one of the most widely used services to transfer files securely, and Docentric turns D365FO into a one-click process that feeds it!
An SFTP (Secure Shell File Transfer Protocol) server moves files through a single, encrypted SSH tunnel. Users log in with a password, a private key, or both, and almost every OS has a built-in client.
Why SFTP still matters in 2025
While it may seem that using an SFTP server in the era of APIs is not the best solution, it’s widely used in some industries as an easy way to perform secure file import and export:
- Banks still publish account statements via SFTP.
- Tax authorities mandate secure file drops.
- Legacy systems often accept SFTP before having an API.
Electronic invoicing is evolving fast across Europe. While several EU countries already have their own national e-invoicing formats, others are now adopting Peppol International Invoice (PINT), ZUGFeRD, OIOUBL, and other standardized formats. All of these can be securely exchanged via SFTP using the Peppol network.
In short, SFTP stays alive because it’s simple, secure, and everybody already has it.
Configuring the SFTP server in D365FO
Before we can use the SFTP server as a print destination, we must configure the connection to the server. Let’s learn about the form's elements.
Open the form in Organization administration > Docentric AX > Azure and SFTP settings > SFTP settings.
We can also open it from the Docentric AX workspace, in the Related tab, under Azure and SFTP settings.
![]()
The grid on the form contains all the fields needed to create a new connection. Here we can find:
| Field | Purpose/Notes |
|---|---|
| Company ID | Legal entity for which this connection applies. |
| SFTP server site | Friendly name of the endpoint (used in drop-downs later). |
| SFTP server hostname | FQDN or IP address of the SFTP host. |
| SFTP server port | Listener port (defaults to 22). |
| SFTP server authentication type |
Method used to log in:
|
| SFTP server username | Account name on the SFTP host. |
| SFTP credentials storage |
Where the secret is kept:
|
| SFTP credentials | The actual password or the private‑key content. Use Upload private key to paste the file safely. |
| Private key password | Passphrase for an encrypted key file (enabled only when auth type = “Private key (password‑protected)”). |
| Key Vault SFTP credentials | Key Vault secret that contains the password or key file (visible only when storage = “Azure Key Vault”). |
| Connection status | Success/failure flag updated by the Refresh button. |
| Status message | Detailed error or confirmation text populated by the Refresh button. |
Additionally, the form has two status fields that show the connection status when the refresh operation is performed, and message details if an error occurs.
Next, let’s learn about what each element on the menu does.
Advanced parameters
For each server setup, we can configure additional parameters with this button:
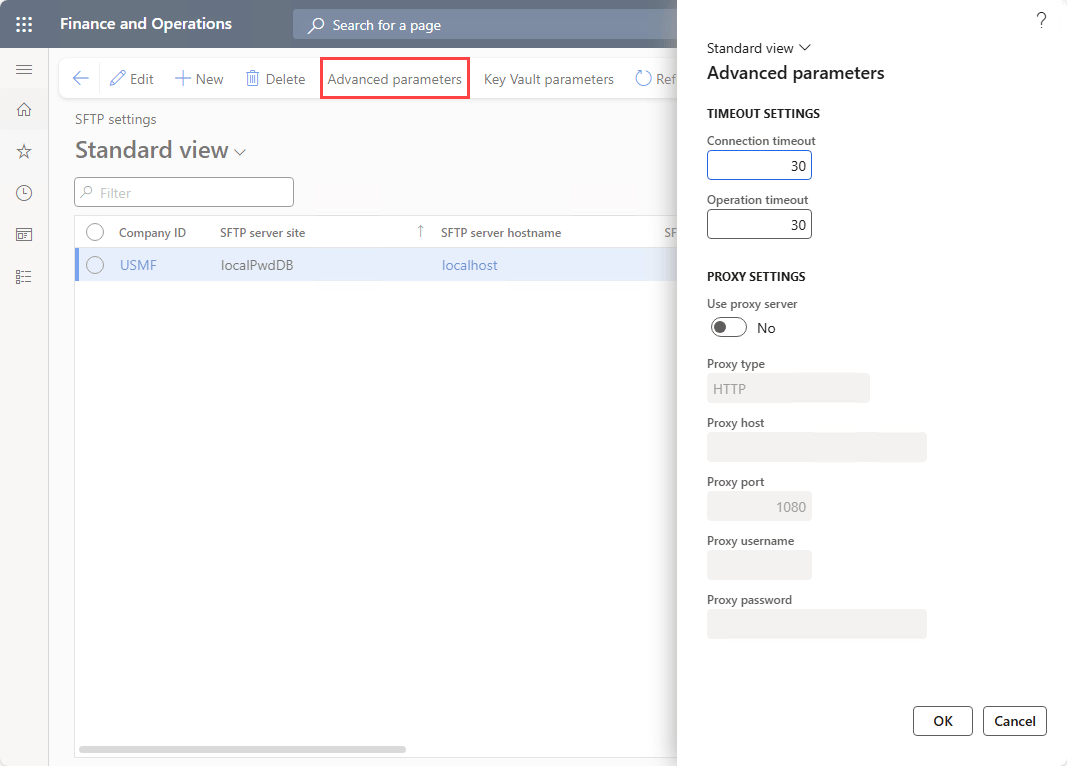
First, in the top group, we have Timeout settings, which define the maximum time to wait for:
- Connection timeout: the time allowed to establish the connection. The default is 30 seconds.
- Operation timeout: the operation (like upload or download) to complete. The default is also 30 seconds.
In the lower group, we have the Proxy settings, which are used to connect to the SFTP server through a proxy server.
- Use proxy server: enable this if we want to configure the proxy server.
- Proxy type: the protocol to be used, HTTP or SOCKS5.
- Proxy host: the hostname or IP address of the proxy server.
- Proxy port: the port on which the proxy server runs. By default, it’s set to 1080.
- Proxy username: the username to authenticate, if any.
- Proxy password: the password, if required.
Key Vault parameters
This button will open the standard D365FO Key Vault parameters form, where we can configure different connections to Azure Key Vault resources and their secrets that we use in the main SFTP settings form.
Refresh
The Refresh button checks that the connections to all configured SFTP servers work. Once the process has finished, it updates the Status fields and displays error messages if any of the SFTP sites fail to connect.
Upload private key
When the authentication type is either Private key or Private key (password-protected), we connect to the SFTP server using a private key file.
We've added this button to simplify adding the key file contents to the SFTP credentials field and avoid possible errors when copying the content of the file.
When we click it, a new dialog to upload the key will open:
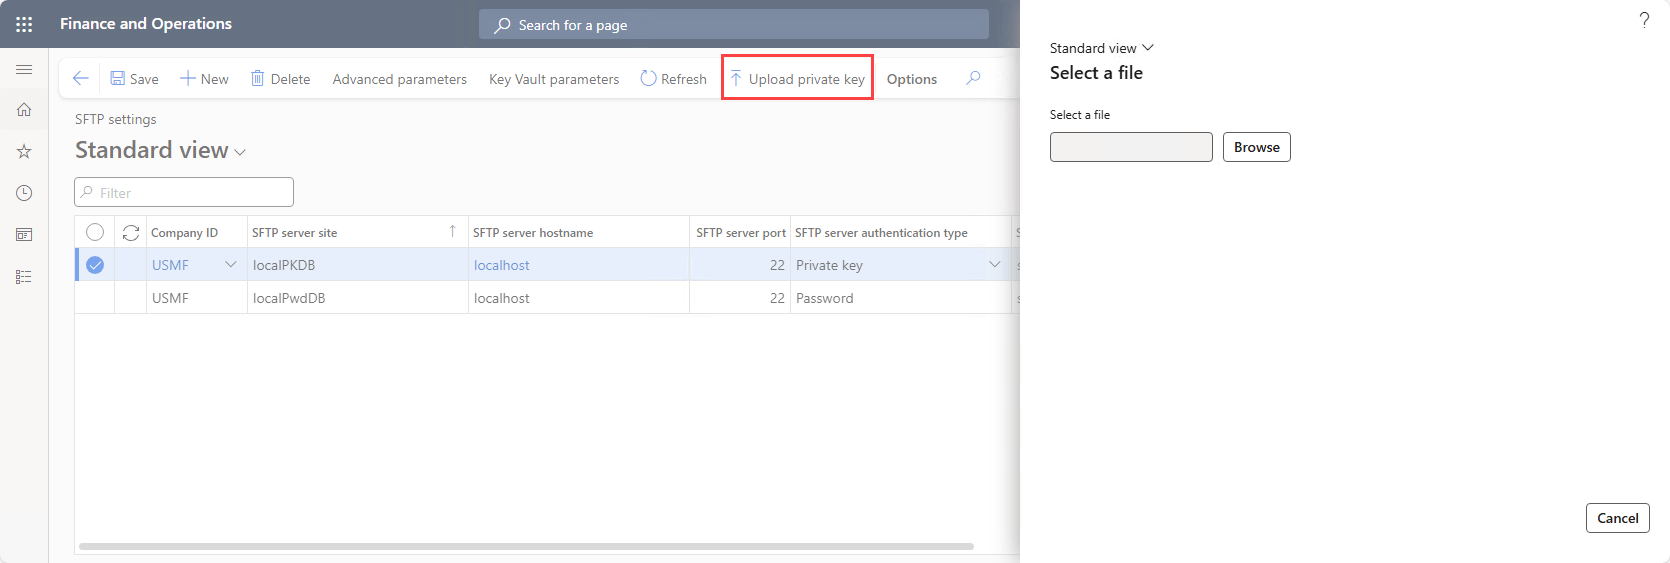
Here we can upload our private key file. While there is no filter on the browse dialog, the following algorithms are accepted:
- RSA
- EC (Elliptic Curve)
- OpenSSH
- PKCS8
- SSH2 (SSH.com)
- Unencrypted private key
Other algorithms won’t be validated, and we won’t be able to use them.
After uploading the file, its content is saved in the encrypted field, and the connection validation runs.
Optional: create a key file
If we don’t have a key file, we can generate one. Open a command prompt and call:
|
1 |
ssh-keygen |
If we don't specify an algorithm, Ed25519 is used. If we want to generate an RSA key, we can use the –t parameter:
|
1 |
ssh-keygen -t rsa |
This command generates two files: one without an extension, and one with the .pub extension. In the client we need to upload the file without extension, which is the private key file.
Configure a print destination using SFTP
Once we have the SFTP connection configured and validated, we can use it as a Docentric File print destination.
For this example, we will be printing the sales invoice. Open the Docentric File print destination. Starting with v.3.5.0, the Send to SFTP fast tab will be found here:
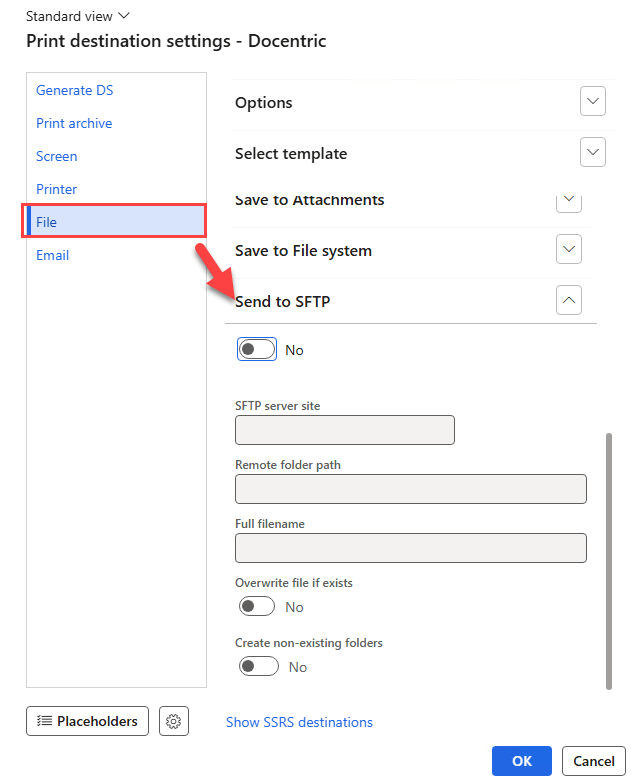
Wwe have some options:
- SFTP server site: the server we want to use.
- Remote folder path (optional): the folder in our remote SFTP server where we would like to save the file.
- Full filename: this field just displays the full path and filename that will be saved.
- Overwrite file if exists: if enabled, it will overwrite the file if it already exists.
- Create non-existing folders: if we set a Remote folder path field that doesn’t exist in our SFTP server, this option will create the folder first.
For example, we will be printing to a path using the customer invoice account using a placeholder, so the setup will look like this:
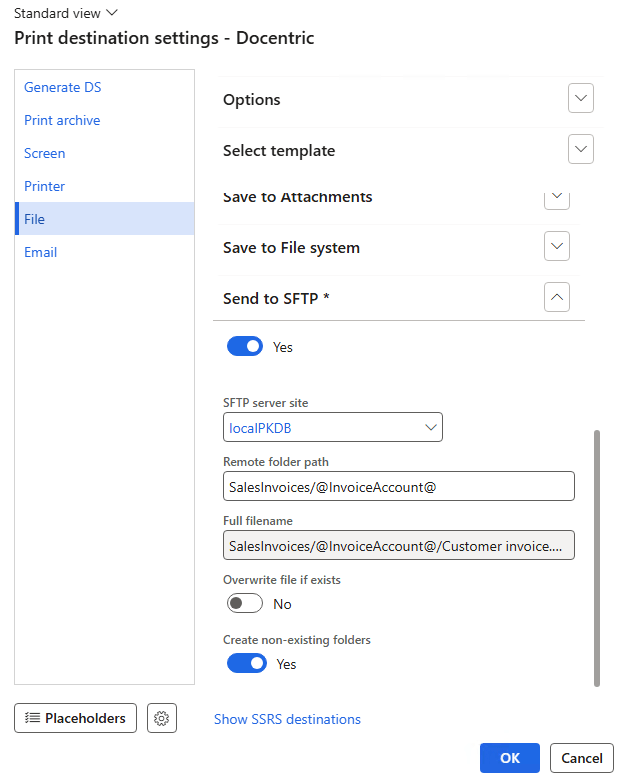
Notice that we’re enabling folder creation because we’re using a placeholder for the path. It’s unlikely that we will have folders for all customers on the remote SFTP location!
Finally, click the OK button and navigate to the sales invoice journal in Accounts receivable > Inquiries and reports > Invoices > Invoice journal to print an already posted invoice.
Select an invoice and then click the View button on the action pane, and Use print management:

Now using any of the SFTP servers out there, connect to our server and look for the file in the path we set. In our example, we use FileZilla, and can see the following:
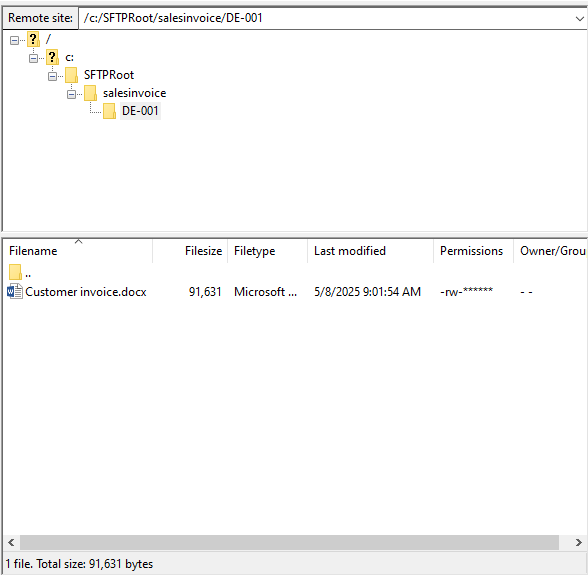
The SFTPRoot folder is the root folder specified in the SFTP server setup used. Inside it, we can see the salesinvoice folder, which contains the DE-001 folder for the customer invoice account.
And inside the DE-001 folder, we have the printed invoice!
Wrapping it up: putting SFTP to work
With just a handful of settings and a quick connection test, we’ve turned D365FO into a hands-free courier that can print and send documents straight to any SFTP box our partners or regulators demand.
Once the server details are in place:
- Built-in security: SSH encryption, credential storage in Key Vault, and optional proxy rules keep auditors (and the CISO) happy.
- No more manual uploads: Docentric print destinations route invoices, statements, or any report to the right folder the moment they’re generated.
- Placeholders are supported: Using placeholders to automatically sort all the documents into the right folder.
- Flexibility: Timeouts, private key options, and folder auto-creation make the setup useful whether we’re talking to a bank, a modern fintech, or a third-party archive.
Configure once, print many documents, and let our new feature send reports to SFTP do the heavy lifting!