
In some advanced reporting scenarios, such as the WHSPickListShipping.report, it is necessary to combine multiple tagging elements, including Group, Context, Var, and List element.
In this forum post we are doing to design step by step a report template using a combination of tagging element.
Use-case scenario
Suppose that we want to create a WHSPickListShipping report with the following requirements
- The report may contain one or more shipments.
- Each WHSWorkLine records related to the same ShipmentId must be displayed on a separate page/section.
- Each shipment section must include:
- Header information (ShipmentId, Delivery Address, etc.)
- A table of WHSWorkLine records
We are going to build this template from scratch using a sample DDSP file.
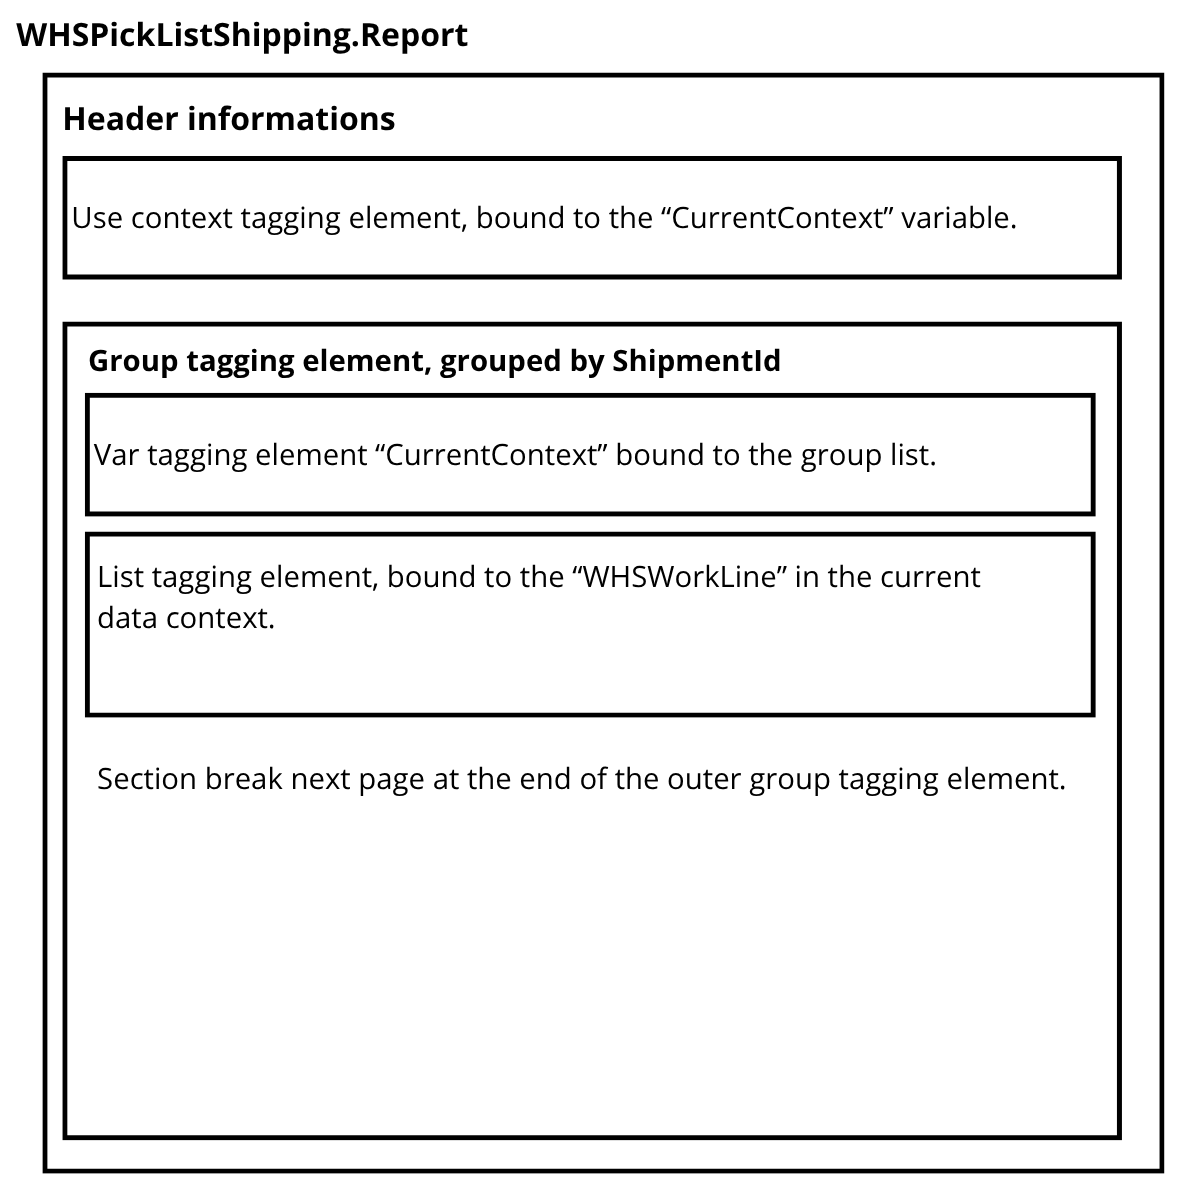
Template design layout :
The following image illustrates the layout plan for the target template.
Template design steps
Now let’s start designing the report template using Docentric Microsoft word add-in designer.
Step 1: Create outer group
The purpose of the outer group is to group WHSWorkLine records by ShipmentId.
Before starting, we should enable showing the paragraph mark and other hidden formatting symbols by clicking on the paragraph mark in the Home ribbon for a better visibility.
Create a Group tagging element with the following properties.
Group value : WHSWorkLine
Group key : ShipmentId
Sort : ShipmentId
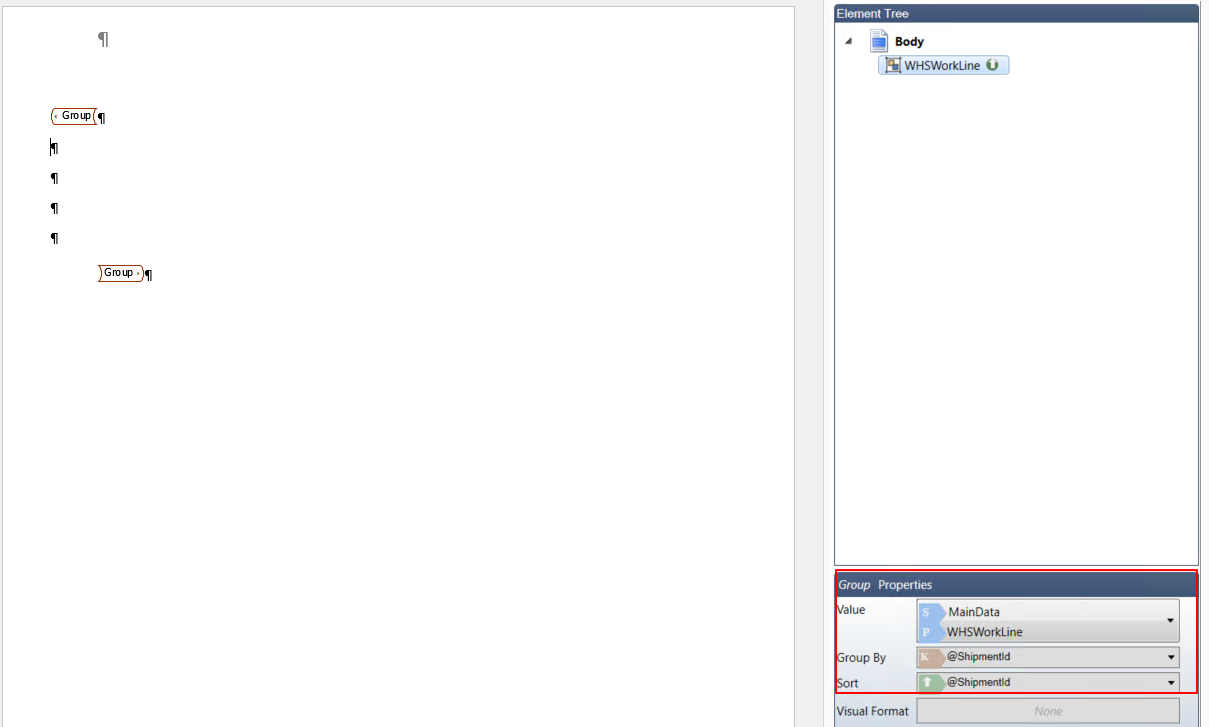
This ensures that all work lines belonging to the same shipment are grouped together.
Step 2: Insert a List tagging element
Within the group, add a List tagging element bound to WHSWorkLine from the Current Data Context to display the items details. In our scenario we are going to display the Item Id, Item name and Quantity, use the Field tagging element to display table columns value.
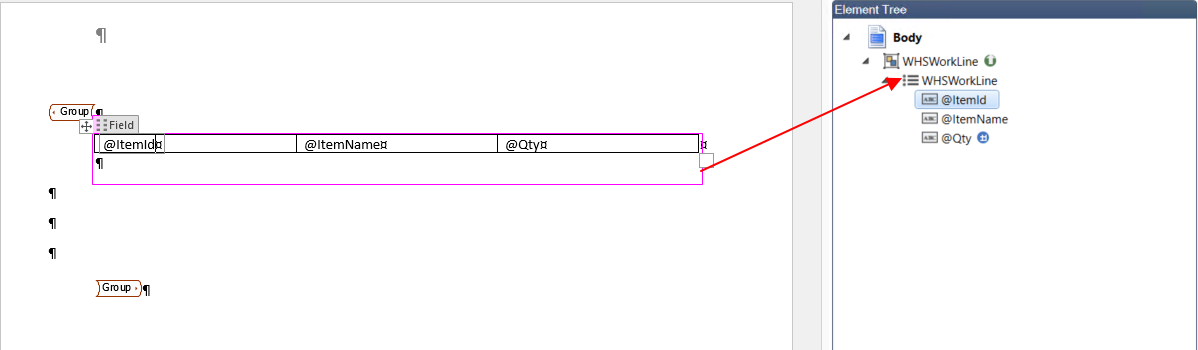
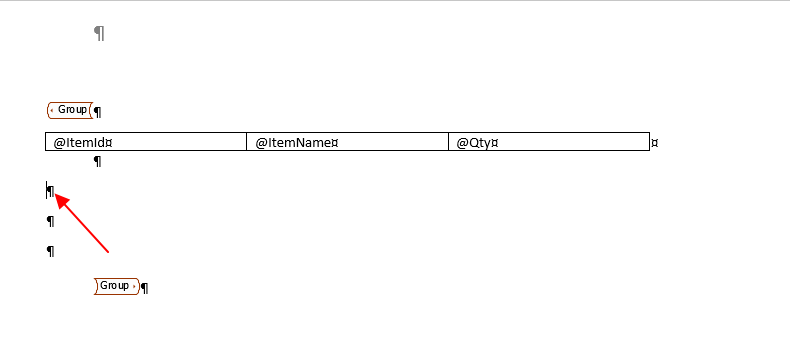
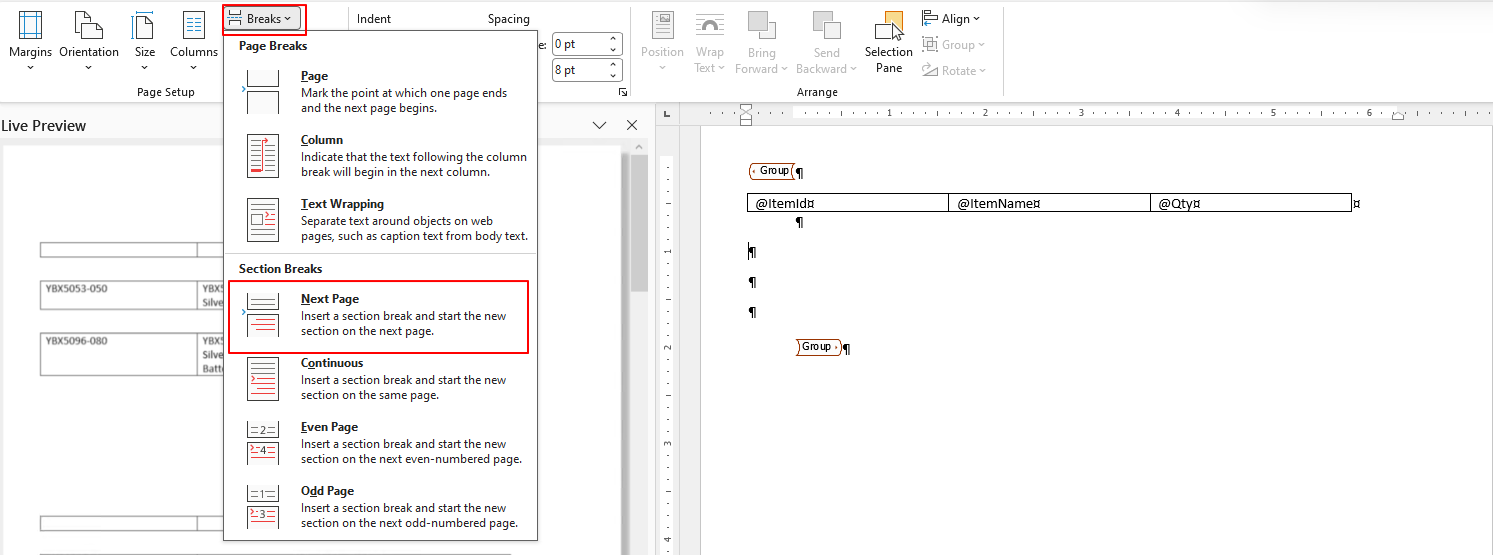
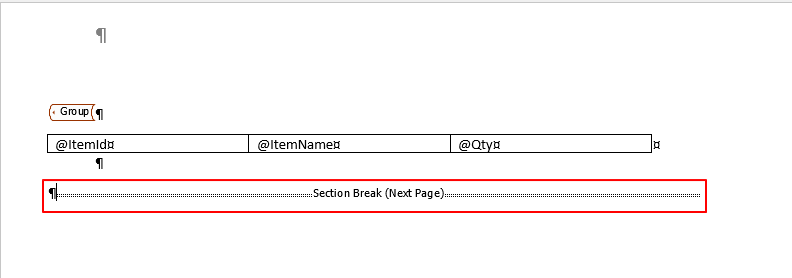
Now we will insert Next Page Section Break at the end of the Group tagging element. This way we’ll get a new section for each new group, allowing us to have different headers and footers for each section.
Step 3: Create the Var tagging element
The Var tagging element is used to declare a variable and bind it to some data node from the DDSP file. Typically, it is bound to the Current Data Context, meaning that the variable will point to the data which are in the Current Data Context scope. Variable, declared in this way must have a name, by which it can be referenced.
In our case we will insert the Var tagging element in the outer Group tagging element, so that it will contain the data from the current Picking list. We will then be able to use this data in the section header with the help of this variable.
We will insert the Var tagging element just above the product list. It will be bound to the current WHSWorkLine, as shown in the image below. The name of the variable will be “CurrentContext”.
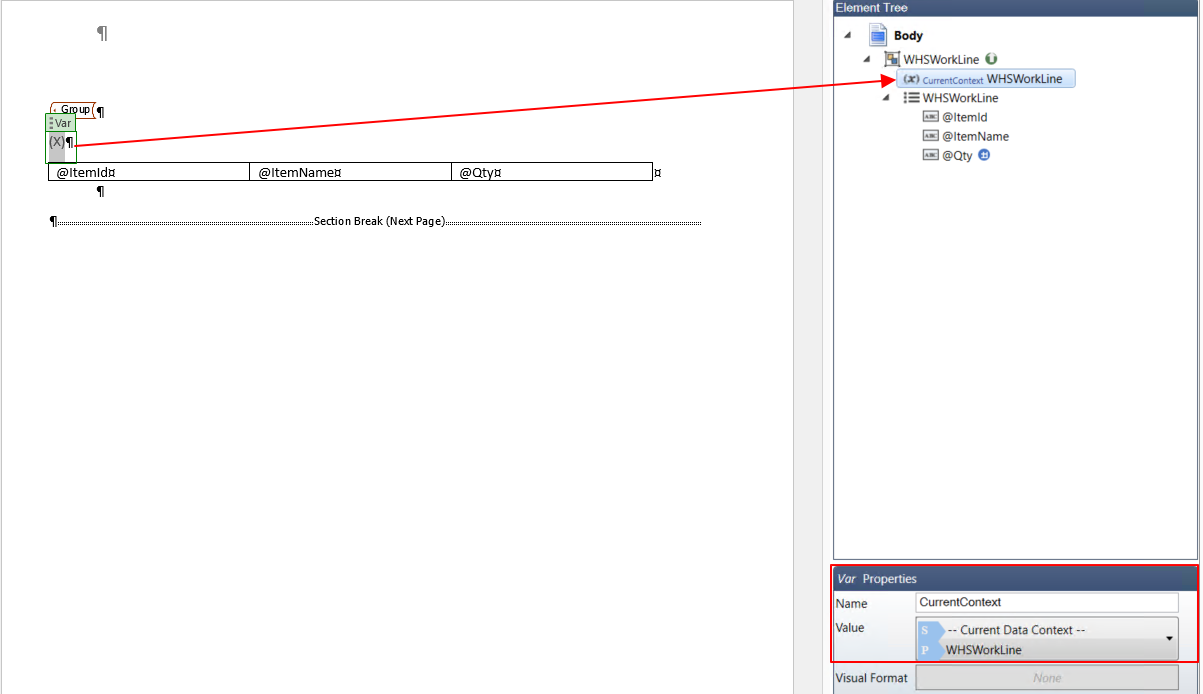
Variable is now ready to use.
Step 4: Header section
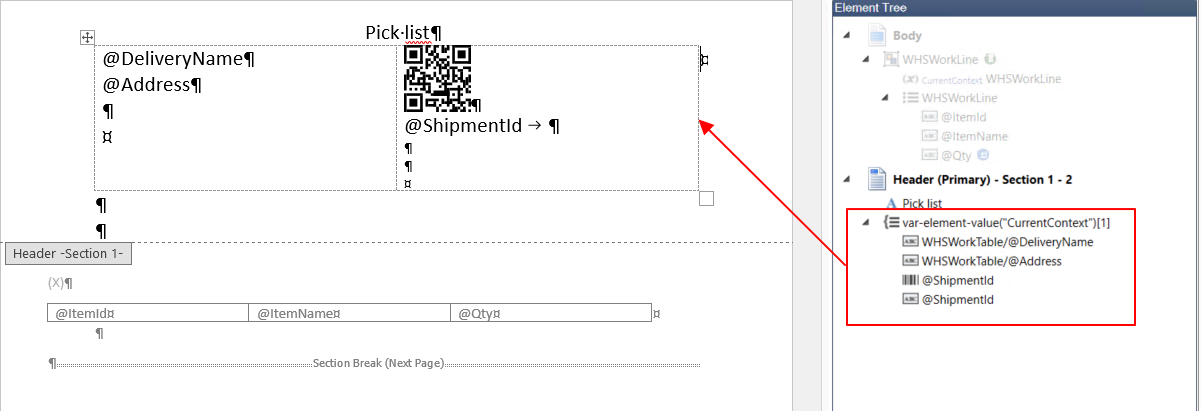
In the header section, we are going to display the ShipmentId as QR code, the Delivery name and Delivery address.
Start adding a label tagging element to display the report title then create a table with one row and two columns. Then Wrap the header table with a Context tagging element and bind the context value to the already created variable “CurrentContext”
Since CurrentContext represents a list of elements (grouped data), and all elements share the same ShipmentId, you can safely bind header fields to the first element of the list.
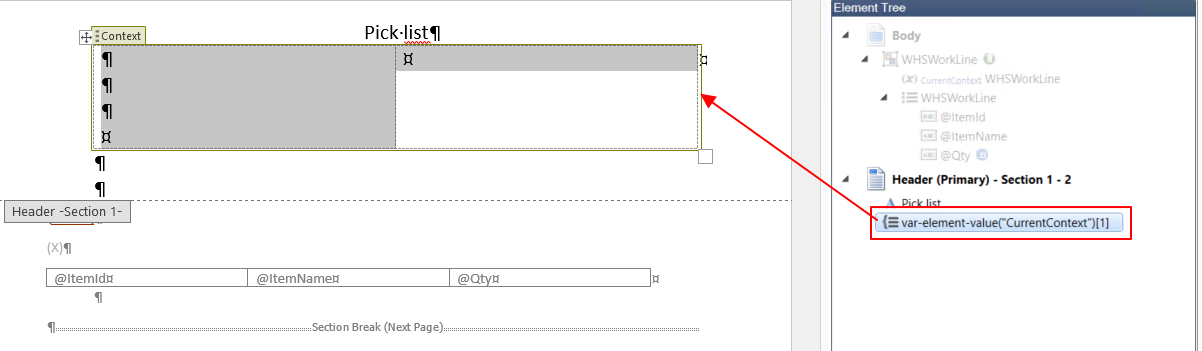
For the first column add two Fields tagging element to display the Delivery name and Delivery address and for the second column add Barcode tagging element.
Bind the header elements as following:
Step 6: Testing
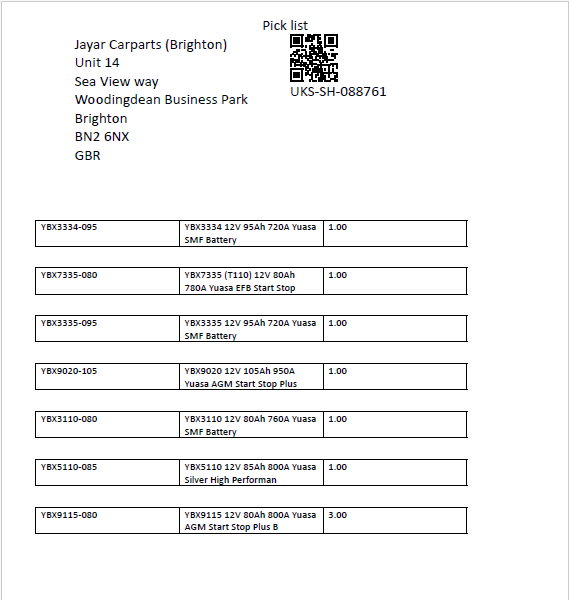
Let’s test the report if it displays correctly. It should look like the one on the image below.
Summary
This approach demonstrates how to build a multi-section report using Docentric:
- Group ensures proper data segmentation (per shipment)
- Section breaks provide page-level separation
- Var + Context enable reuse of grouped data in headers
- List elements handle line-level details
Resources:
report-template.docx (55.1 KB)
WSHPickingDDSP.ddsp (284.1 KB)