Running into an issue under a check form with 2slps and the check in the middle, here the situation.
If the check has less than 10 transaction. I would only wish to have one page with the 10 transactions in the top and buttom slip and of corse the check in the middle.
If the check has more than 10 transactions I do expect to have 10 transactions in each page -Except the last one - and every page should have a voided check (means to have the word ‘Void’ in the amountInWord and the mount ). then in the last page I would expect to have a page with the remaining transaction and the good check with the good numbers.
I reviewed your template and requirements. The first thing I want to point out is that the standard D365FO check prints the data on the first check and voids all subsequent checks, which are used only to display the slips with the remaining transactions after those added on the first page.
In your scenario, you want to print the data on the last check. I don’t recommend that, because internally D365FO numbers the checks and, in case of overflow, treats the first check as valid and the others as void. As a result, your printed documents will not match the data stored in D365FO.
You created a List tagging element to display the transactions on individual checks. That is possible, but you need to understand how the transaction data is added to the check. In the case of overflow checks, all transactions are listed under the first check. If you want to split them across checks, you need to calculate sets of data that go to individual checks (for example, 1–10 to the first check, 11–20 to the second one, etc.).
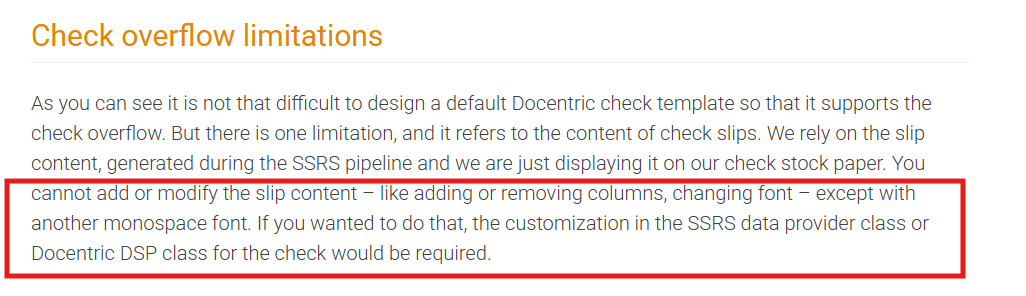
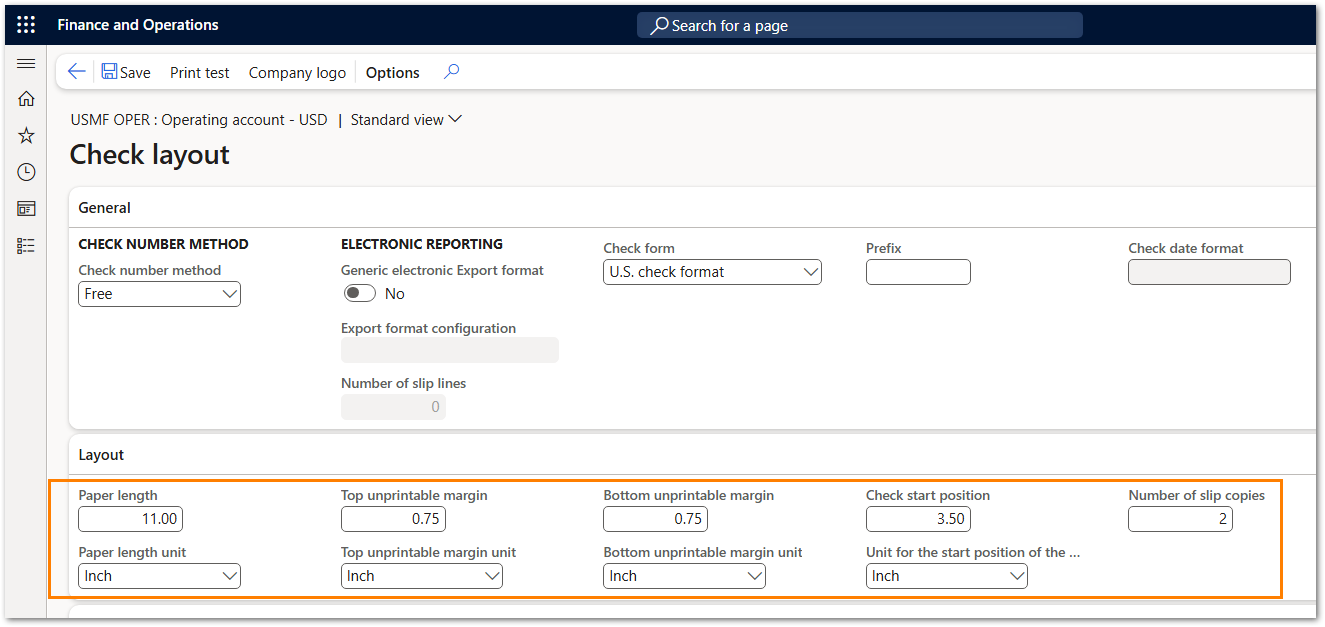
A much easier approach for overflow checks is to set check layout properties: navigate to Cash and bank management > Bank accounts > Bank accounts, select the bank account, navigate to Set up > Layout > Check layout, and review the settings under the Layout fast tab. Experiment with these settings until you get 10 transactions per check slip from D365FO. Insert a Field tagging element into the slip portion of the check, set the font to Courier New, choose font size 8 pt, and bind the Field tagging element to the SlipTxt field in the check data. The SlipTxt field contains a string with slip transactions and is displayed in a table-like form if you use a monospace font.
If you want to understand more about using Docentric for check design, I warmly recommend the following two blog articles with accompanying videos:
You can also review the check templates that we provide in the Docentric AX SSRS Replicas model. For the US check, we provide overflow templates that you can rearrange into the Canadian check template. See specifically how the SlipTxt field is implemented on the overflow checks.
Thanks for the overview and kind usefull information.
I did try the standard 2slips and the check in the middle. it doesnt show the transactions in case I have more than 10. (because of the If tagging element.)
The check template you are referring to is meant to print only regular checks, not void ones. In case of overflow checks, you can print the Payment Advice report (during the check printing dialog, you have the option to select printing the Payment advice).
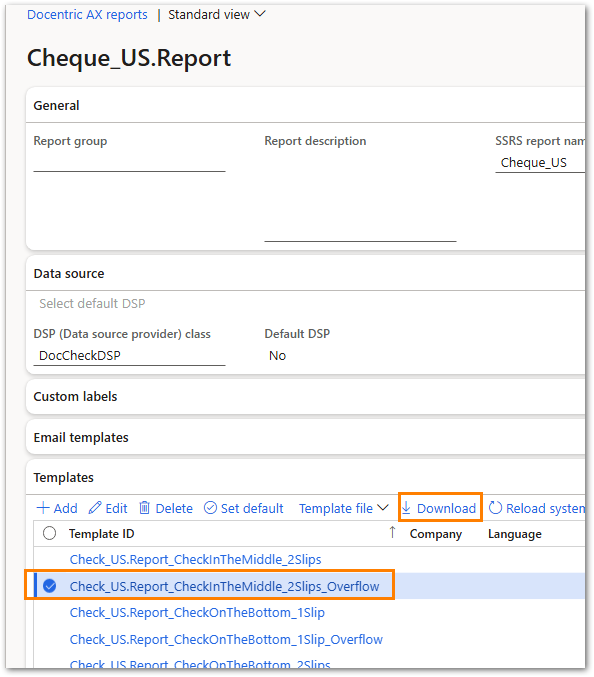
See Check_US.Report_CheckInTheMiddle_2Slips_Overflow as shown below to understand how the transactions on the overflow check are implemented.
I did read your article about the overflow check. it was usefull. however the actual requirement (as per my understanding) can’t be done with the standard DDSP, because we need more column and delete other and also we have a priprinted check where our check should be printed. so yes there are many chnages on the format and measurements to change:
We are trying to avoid any customization on DSP class and avoid also further charges for our client which is using Docentric licence. for that @ALOT do you think we can do it with the actual DDSP structure? You feedback would be much appreciated:
the requirement as per I explained in my previous msgs: if we have more than 10 transactions in the check, we need to display a voided check starting from the first page, then the last page should contain the remaining transactions with the good check. and also if we got more checks in the journal, it should behave in the same way.
OK, I see. The standard SlipTxt value cannot be used on your check because you need custom columns in the slip. I will prepare a skeleton check template for you that will split transactions into groups of 10 records.
You will still need to set the check layout settings in D365FO, as I explained earlier, to get SlipTxt with 10 records per check. This is required to have an exact match between transactions on checks in F&O and your Docentric template.
If you are using Letter paper size (8.5 x 11 inches), try the following values:
These measurements have no effect on how the Docentric template is displayed (that is controlled by your template design), but they affect how many transactions F&O will fit into the SlipTxt field, which will be part of the check data at printing runtime.
Once you set the check layout parameters, print a check with more than 20 transactions and generate a DDSP file.
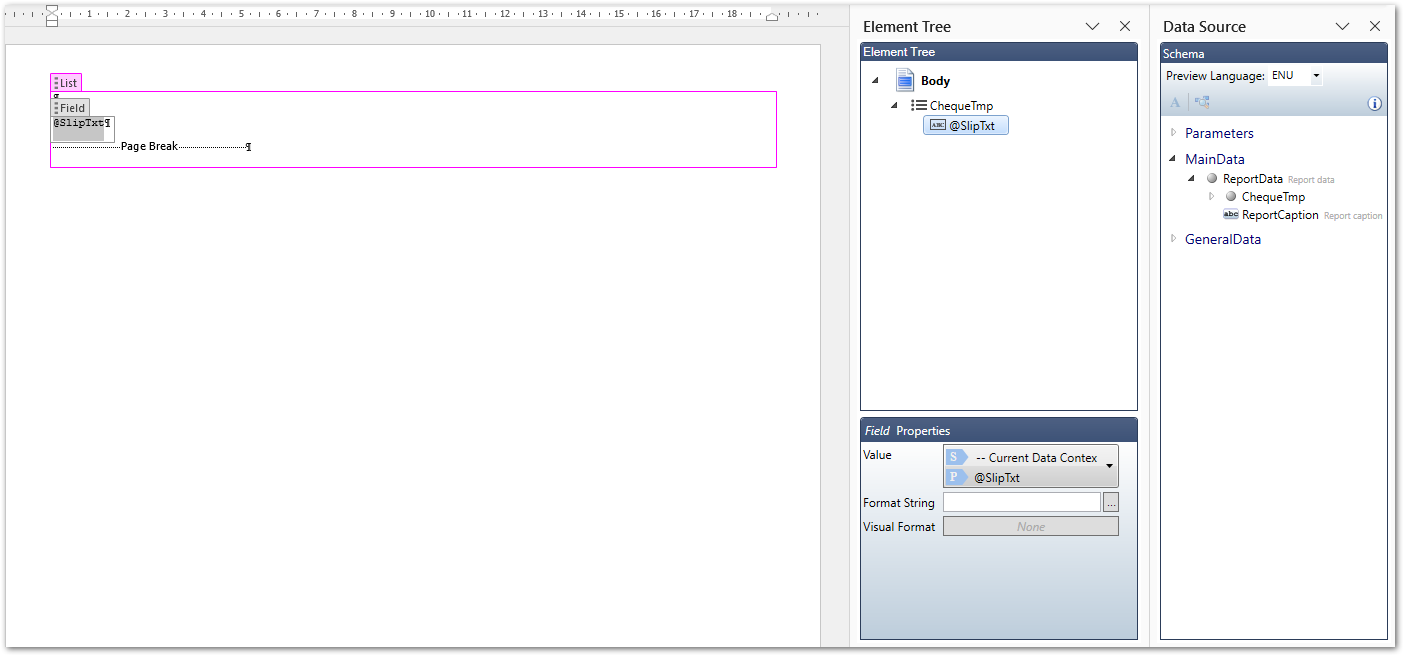
Then create a blank page with three paragraphs and a page break. Set page margins to Narrow. Select everything and set the font to Courier New, size 8 pt. Load your DDSP file into the template. Select everything again, insert a List tagging element, and bind it to ChequeTmp records. Then insert a Field tagging element into the paragraph before the page break and bind it to the SlipTxt field.
Preview the results and count how many transactions are in the slip on the first page. If there are more than 10, you will need to increase the top and bottom unprintable margins of the check layout in F&O; otherwise, decrease the values. You need to get exactly 10 transactions in SlipTxt.
When you are done, send me the DDSP file so that I can test it with my skeleton check template and ensure that the transactions are split correctly in the template I am preparing.